
There’s something absolutely magical about the moment you take that first bite of a perfectly thin crepe, warm and silky, filled with melted Nutella that’s just beginning to ooze out the edges. I’ll never forget the first time I made crepes from scratch – I was convinced they’d be impossible to master, but honestly? They’re so much easier than you think, and infinitely more rewarding than any store-bought version.
I discovered this recipe during a particularly homesick moment when I was craving those incredible crepes I’d had at a tiny café in Paris. After several attempts (and yes, a few disasters involving torn crepes and way too much batter), I finally nailed the perfect technique. Now, making Nutella crepes has become my go-to weekend breakfast treat, and trust me, once you master this recipe, you’ll be the hero of every brunch gathering.
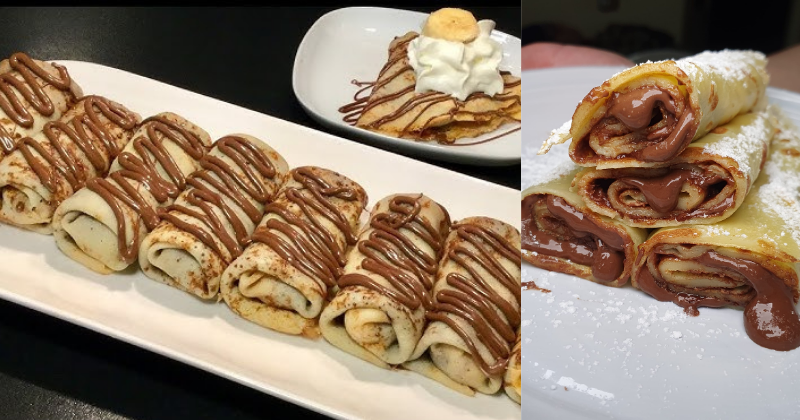
What makes these crepes truly special is their delicate, paper-thin texture that practically melts in your mouth, paired with that rich, hazelnut-chocolate goodness of Nutella. They’re elegant enough for special occasions but simple enough to whip up any time you’re craving something extraordinary.
Table of Contents
Recipe Overview
These classic French-style Nutella crepes are the perfect balance of simplicity and indulgence. With just a handful of basic ingredients, you’ll create thin, lacy crepes that are absolutely divine when filled with warm, melty Nutella. The batter comes together in minutes, and once you get the hang of swirling it in the pan, you’ll be making crepes like a pro.
Difficulty Level: Beginner-friendly (don’t let the French name intimidate you!)
Prep Time: 10 minutes
Cook Time: 20 minutes
Total Time: 30 minutes
Serving Size: Makes about 8-10 crepes (serves 4 people)
What makes this recipe unique is the resting time for the batter – this little trick ensures your crepes turn out incredibly smooth and pliable. Plus, I’ll share the secret to getting that perfect golden color and avoiding the dreaded thick, pancake-like crepe disaster!
Ingredients
For the Crepe Batter:
- 1 cup all-purpose flour (spooned and leveled – this matters!)
- 1 1/3 cups whole milk (room temperature works best)
- 2 large eggs (also at room temperature)
- 2 tablespoons melted butter (plus extra for the pan)
- 1 tablespoon granulated sugar
- 1/4 teaspoon salt
- 1/2 teaspoon vanilla extract (the secret ingredient that elevates everything)
For Assembly:
- 1/2 to 3/4 cup Nutella (or more – I won’t judge!)
- Powdered sugar for dusting (optional but pretty)
- Fresh strawberries or bananas (optional, but highly recommended)
Ingredient Tips: Always measure your flour properly by spooning it into the measuring cup and leveling it off. Too much flour will make your crepes thick and chewy instead of delicate and tender. If you don’t have whole milk, you can substitute with 2% milk, but the crepes won’t be quite as rich. Room temperature ingredients mix together much more smoothly, so take your eggs and milk out about 30 minutes before cooking.

Cooking Method
Step 1: Make the Perfect Batter
Time: 5 minutes
In a large mixing bowl, whisk together the flour, sugar, and salt. Create a well in the center – this is where the magic begins! In a separate bowl, whisk together the milk, eggs, melted butter, and vanilla extract until completely smooth.
Pour the wet ingredients into the flour well and whisk from the center outward. Here’s the secret: start slowly! If you dump everything together at once, you’ll get lumps that are nearly impossible to smooth out. Pro tip: If you do end up with a few stubborn lumps, strain the batter through a fine-mesh sieve. Your future self will thank you!
The finished batter should be completely smooth and have the consistency of heavy cream. If it seems too thick, add milk one tablespoon at a time until it flows easily off your whisk.
Step 2: Let the Batter Rest
Time: 15-30 minutes
This is the step that separates good crepes from absolutely incredible ones! Cover your batter and let it rest for at least 15 minutes (30 minutes is even better if you have the time). During this rest, the flour fully hydrates, and any air bubbles settle out. Trust me on this – it makes all the difference in achieving those perfectly smooth, flexible crepes.
While you’re waiting, gently warm your Nutella in the microwave for 15-20 seconds. This makes it so much easier to spread and creates that gorgeous, drippy texture we’re all after.
Step 3: Heat Your Pan Like a Pro
Time: 2 minutes
Use a non-stick skillet or crepe pan that’s about 8-10 inches in diameter. Heat it over medium-low heat – and I mean it about that medium-low! Too hot, and your crepes will cook too quickly and become tough. You want gentle, even heat.
Test the temperature by dropping a small amount of batter into the pan. It should sizzle gently and set within about 30 seconds. If it browns immediately, turn down the heat and wait a minute before trying again.
Step 4: The Crepe-Making Dance
Time: 2-3 minutes per crepe
Lightly butter your pan – I like to use a paper towel to spread it evenly and remove any excess. Here’s where things get fun! Pour about 1/4 cup of batter into the center of the pan, then immediately lift the pan off the heat and swirl it in a circular motion, tilting it so the batter spreads out in a thin, even layer.
Don’t worry if your first few crepes look wonky – this is totally normal! I call them “practice crepes,” and they still taste amazing. The key is to work quickly while the batter is still liquid, and don’t be afraid to really tilt that pan to get the batter to the edges.
Cook the crepe for about 1-2 minutes until the edges look set and slightly golden. You’ll know it’s ready to flip when you can easily slide a thin spatula underneath without it sticking. Pro tip: The first side always looks prettier, so that’s your “presentation” side!
Step 5: The Flip and Finish
Time: 30 seconds per side
Here’s where confidence is key! Slide your spatula under the crepe and flip it quickly. Don’t worry if it folds over on itself – just gently unfold it with the spatula. The second side only needs about 30 seconds to a minute to cook.
Stack your finished crepes on a plate and cover with a clean kitchen towel to keep them warm and prevent them from drying out. Each crepe should be thin enough that you can almost see through it – that’s the goal we’re aiming for!
Step 6: Assembly Magic
Time: 5 minutes
Now for the best part! Take a warm crepe and spread about 1-2 tablespoons of that gorgeous, warmed Nutella down the center. Don’t go all the way to the edges – you want to be able to fold it without the filling squeezing out everywhere.
Fold the crepe in half, then in half again to create a triangle, or simply roll it up like a burrito. Both ways are delicious! Dust with powdered sugar if you’re feeling fancy, and add some fresh berries for a pop of color and freshness.
Chef’s Tips & Variations
Storage Secrets: These crepes actually freeze beautifully! Layer them between parchment paper and freeze for up to 2 months. When you’re ready to enjoy them, just thaw at room temperature for about 20 minutes, then warm gently in a dry pan for 30 seconds per side.
Flavor Variations: While Nutella is absolutely divine, don’t be afraid to experiment! Try fresh strawberries and whipped cream, banana and caramel sauce, or even savory fillings like ham and cheese for a completely different experience. I’ve also made these with a touch of orange zest in the batter – absolutely incredible with chocolate fillings!
Troubleshooting Tips: If your crepes are turning out thick, your batter is probably too thick – thin it with a little more milk. If they’re tearing when you flip them, your pan might be too hot, or the crepe isn’t quite ready to flip yet. Give it another 30 seconds and try again.
Make-Ahead Magic: You can make the batter up to 24 hours in advance! Just give it a good whisk before using, as it tends to separate slightly when it sits. This actually makes for an even better texture, so it’s a win-win.
Pro tip for entertaining: Set up a crepe station with various fillings and let guests build their own. It’s interactive, fun, and everyone gets exactly what they want. Plus, you’ll look like the most sophisticated host ever!
Conclusion
There’s something deeply satisfying about mastering the art of crepe-making, and once you do, you’ll find yourself making them all the time. These Nutella crepes aren’t just breakfast – they’re a celebration, a comfort food, and a little piece of French elegance right in your own kitchen.
The beauty of this recipe lies in its simplicity and versatility. Whether you’re impressing guests at a weekend brunch or treating yourself to a special weekday breakfast, these crepes deliver every single time. Don’t be discouraged if your first attempts aren’t perfect – even imperfect crepes taste absolutely amazing, and the practice is half the fun!
So grab your whisk, warm up that Nutella, and get ready to fall in love with homemade crepes. Trust me, once you taste the difference between these delicate, made-from-scratch beauties and anything store-bought, there’s no going back. Your kitchen is about to smell absolutely incredible, and your taste buds are in for the treat of a lifetime!