
Let me tell you about the day my world changed forever. I was craving Oreos something fierce, but when I checked my pantry, I found nothing but disappointment and empty cookie packages (thanks, kids!). That’s when I decided to take matters into my own hands and create homemade Oreos from scratch. What happened next was pure magic – these homemade beauties turned out even better than the store-bought version! The chocolate cookies were perfectly crisp with just the right amount of cocoa flavor, and that cream filling? Let’s just say I may have licked the bowl clean. Trust me, once you make these homemade Oreos, you’ll never look at the packaged ones the same way again.
Table of Contents
What Makes These Homemade Oreos So Special
These aren’t just any chocolate sandwich cookies – these are the real deal! What sets my homemade Oreos apart is the deep, rich chocolate flavor in the cookies combined with a silky-smooth vanilla cream filling that’s perfectly balanced. Unlike store-bought versions that can sometimes taste artificial, these babies are made with real ingredients and love.
The beauty of making Oreos at home is that you control every single ingredient. Want extra vanilla in your cream? Go for it! Prefer a slightly sweeter cookie? You’ve got the power! Plus, there’s something incredibly satisfying about biting into a cookie you made entirely from scratch.
Difficulty Level: Intermediate (but totally doable!)
Total Time: 2 hours (including chilling time)
Active Cooking Time: 45 minutes
Serves: Makes about 24 sandwich cookies
Ingredients
For the Chocolate Cookies:
- 1¼ cups all-purpose flour
- ½ cup unsweetened cocoa powder (Dutch-processed works best)
- 1 teaspoon baking soda
- ½ teaspoon salt
- ½ cup unsalted butter, softened
- ½ cup granulated sugar
- ½ cup brown sugar, packed
- 1 large egg
- 1 teaspoon vanilla extract
For the Cream Filling:
- ½ cup unsalted butter, softened
- 2 cups powdered sugar
- 2 teaspoons vanilla extract
- 2-3 tablespoons heavy cream
Pro tip: Make sure all your ingredients are at room temperature before you start – this makes mixing so much easier and creates a better texture in your final cookies!
Cooking Method
Step 1: Prepare Your Cookie Dough
Start by whisking together the flour, cocoa powder, baking soda, and salt in a medium bowl. Here’s where I learned something important the hard way – sift that cocoa powder if it looks lumpy! Nobody wants chocolate chunks in their smooth cookie dough.
In a large bowl, cream together the softened butter with both sugars until it’s light and fluffy – this takes about 3-4 minutes with an electric mixer. Don’t rush this step; it’s where the magic happens! Beat in the egg and vanilla extract until everything’s well combined.
Gradually add your dry ingredients to the wet ingredients, mixing just until combined. The dough should come together beautifully and smell absolutely divine. If it seems too dry, add a tablespoon of milk. Too wet? A sprinkle more flour will do the trick.
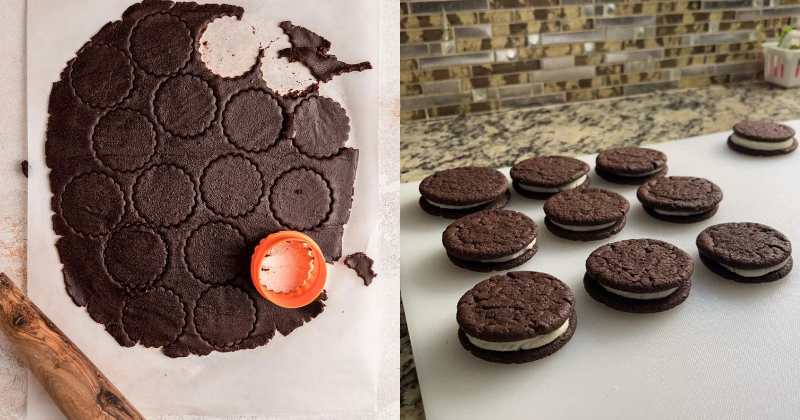
Step 2: Roll and Cut Your Cookies
Here’s where things get fun! Divide your dough in half and shape each portion into a log. Wrap these in plastic wrap and chill for at least 30 minutes. Trust me on this – chilled dough is so much easier to work with!
Once chilled, roll out your dough on a lightly floured surface to about ¼-inch thickness. Using a round cookie cutter (about 2 inches works perfectly), cut out your cookies. I like to re-roll the scraps – waste not, want not!
Chef’s secret: If you don’t have a cookie cutter, a glass works just fine! I’ve used everything from mason jar lids to the rim of a large mug in a pinch.
Step 3: Bake to Perfection
Preheat your oven to 325°F (that’s lower than most cookie recipes, but trust the process!). Line your baking sheets with parchment paper – this prevents sticking and makes cleanup a breeze.
Place cookies about 2 inches apart on your prepared baking sheets. Bake for 12-15 minutes, or until the edges are set. Here’s the thing about these cookies – they won’t look completely done when you take them out, and that’s exactly what you want! They’ll continue cooking on the hot pan and will be perfectly crisp once cooled.
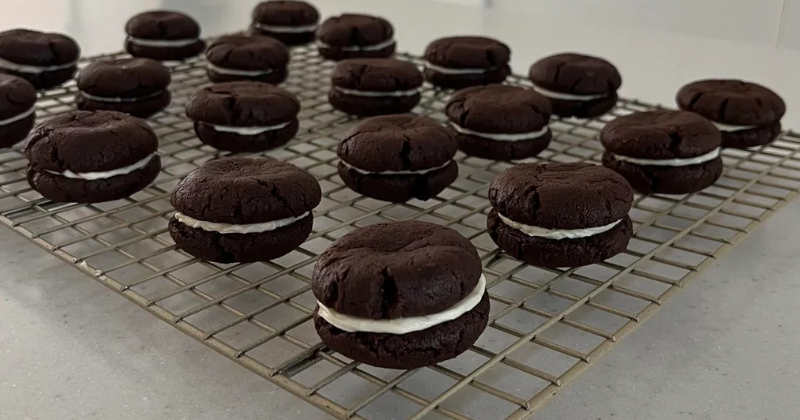
Let them cool on the baking sheet for 5 minutes, then transfer to a wire rack. This is the hardest part – waiting for them to cool completely before adding the filling!
Step 4: Make That Incredible Cream Filling
While your cookies are cooling, let’s make the star of the show – that creamy, dreamy filling! Beat the softened butter until it’s light and fluffy, about 2-3 minutes. Gradually add the powdered sugar, beating well after each addition.
Add the vanilla extract and 2 tablespoons of heavy cream, then beat until smooth and spreadable. If it’s too thick, add another tablespoon of cream. If it’s too thin, add a bit more powdered sugar. You want it thick enough to hold its shape but soft enough to bite through easily.
Step 5: Assembly Time!
This is where the real fun begins! Match up your cookies in similar-sized pairs. Spoon about a tablespoon of filling onto the flat side of one cookie, then gently press the second cookie on top. Give it a little twist – just like you would with a real Oreo!
Pro tip: Don’t overfill them on your first try. You can always add more filling, but it’s messy to remove excess. I learned this lesson the delicious but messy way!
Chef’s Tips & Variations
Let me share some game-changing tips I’ve discovered through many batches of these homemade beauties!
Storage secrets: These homemade Oreos actually get better after a day or two! Store them in an airtight container at room temperature for up to a week. The cookies soften slightly, creating that perfect texture we all love in store-bought Oreos.
Flavor variations that’ll blow your mind: Try adding a teaspoon of espresso powder to your cookie dough for mocha Oreos, or swap out the vanilla in your filling for peppermint extract during the holidays. I’ve even made strawberry cream filling using freeze-dried strawberries – absolutely incredible!
Make-ahead magic: You can make the cookie dough up to 3 days in advance and keep it wrapped in the fridge. The baked cookies (without filling) freeze beautifully for up to 3 months. Just thaw, make fresh filling, and assemble when you’re ready to enjoy.
Troubleshooting tips: If your cookies spread too much during baking, your dough might be too warm. Chill it longer next time! If they’re too hard, you might have overbaked them slightly – reduce the time by a minute or two on your next batch.
Fun serving ideas: Crush these up for the most amazing ice cream topping ever, or use them in homemade milkshakes. I’ve even used them as the crust for a chocolate cream pie – absolutely divine!
Final Thoughts
Making homemade Oreos might seem intimidating at first, but I promise you – if I can do it during a busy weeknight cookie emergency, you absolutely can too! The key is taking your time with each step and not being afraid to adjust things to your taste.
There’s something so satisfying about pulling apart a homemade Oreo and seeing that perfect cream filling inside, knowing you created every bit of it from scratch. Plus, the smell of chocolate cookies baking in your oven is basically aromatherapy!
So grab your apron, put on your favorite playlist, and get ready to create some seriously delicious magic in your kitchen. Your family and friends are going to be absolutely amazed when you tell them these incredible cookies came from your own two hands. And honestly? They might just become your new signature treat.
Don’t worry if your first batch isn’t perfect – mine certainly wasn’t! But they were still absolutely delicious, and each batch just gets better. You’ve got this, and I can’t wait for you to experience the joy of biting into your very own homemade Oreo. Trust me, it’s a moment you’ll never forget!