
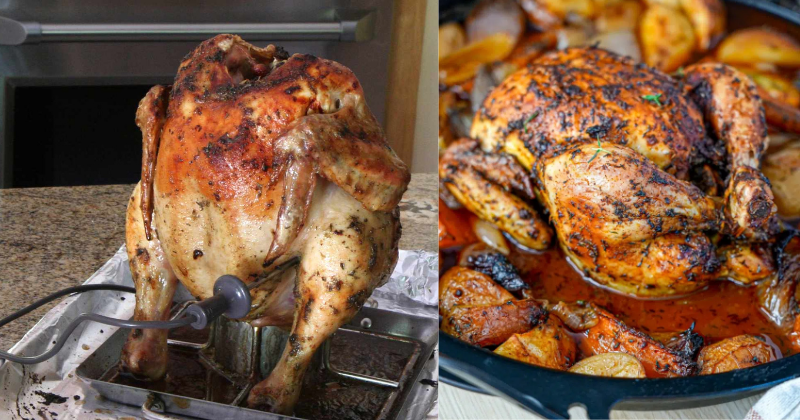
I’ll never forget the first time I made this crispy roast chicken with vegetables for my family. It was one of those dreary Sunday afternoons when everyone needed something warm and comforting, and honestly, I was feeling a bit overwhelmed in the kitchen. But something magical happened when I pulled this golden, crackling bird out of the oven surrounded by perfectly caramelized vegetables. The skin was so crispy it practically sang, and the vegetables had absorbed all those incredible chicken drippings. My youngest actually put down their phone and said, “Mom, this is amazing!” – and trust me, that’s basically a Michelin star review in my house!
This recipe has become our go-to Sunday dinner, and for good reason. It’s the kind of meal that makes your whole house smell like a warm hug, brings everyone to the table without any coaxing, and somehow makes even the most chaotic week feel manageable. Plus, it’s surprisingly foolproof once you know the secrets I’m about to share with you.
Table of Contents
Recipe Overview: What Makes This Roast Chicken Special
This isn’t just any roast chicken recipe – it’s your ticket to achieving that perfect combination of ultra-crispy skin and juicy, tender meat that most home cooks struggle to master. What sets this recipe apart is the technique of starting with high heat to get that skin crackling, then lowering the temperature to ensure the meat cooks evenly without drying out.
The vegetables aren’t just an afterthought either. They roast alongside the chicken, soaking up all those incredible drippings while developing their own beautiful caramelization. It’s like getting two dishes in one pan, and the cleanup is surprisingly minimal for such an impressive meal.
Difficulty Level: Intermediate (but don’t let that scare you!)
Total Time: About 1 hour 30 minutes
Active Time: 20 minutes of prep
Serves: 4-6 people generously
Ingredients
For the Chicken:
- 1 whole chicken (3-4 lbs) – free-range if possible
- 2 tablespoons olive oil or melted butter
- 2 teaspoons kosher salt
- 1 teaspoon freshly ground black pepper
- 1 teaspoon garlic powder
- 1 teaspoon dried thyme
- 1/2 teaspoon paprika
- 1/2 teaspoon dried rosemary
- 1 lemon (halved)
- 4 garlic cloves
For the Vegetables:
- 1.5 lbs baby potatoes, halved
- 3 large carrots, cut into 2-inch pieces
- 1 large onion, quartered
- 1 lb Brussels sprouts, halved
- 2 tablespoons olive oil
- Salt and pepper to taste
- Fresh thyme sprigs
Pro tip: Don’t skip the fresh thyme sprigs – they add an incredible aromatic quality that dried herbs just can’t match. If you can’t find Brussels sprouts, cauliflower florets or parsnips work beautifully too!

Cooking Method
Step 1: Prep Your Chicken Like a Pro (10 minutes)
Preheat your oven to 450°F – yes, we’re starting hot! Remove your chicken from the fridge about 30 minutes before cooking. This is crucial for even cooking, trust me on this one.
Pat the chicken completely dry with paper towels. Here’s where most people go wrong – if there’s any moisture on that skin, you won’t get the crispy results we’re after. I mean really dry it, inside and out.
Mix your seasoning blend in a small bowl: salt, pepper, garlic powder, thyme, paprika, and rosemary. This combination creates the most incredible flavor crust.
Step 2: Season and Stuff (5 minutes)
Rub the olive oil all over the chicken, getting into every nook and cranny. Then generously season with your spice mixture, making sure to season the cavity too. Don’t be shy here – this is where all your flavor comes from!
Here’s the secret: Stuff the cavity with the lemon halves and garlic cloves. As the chicken roasts, these aromatics steam from the inside, keeping the meat incredibly moist while infusing it with subtle citrus and garlic notes.
Step 3: Prepare Your Vegetables (5 minutes)
Toss all your vegetables with olive oil, salt, and pepper. The key is getting them evenly coated so they caramelize beautifully. Scatter them around a large roasting pan, leaving space in the center for your chicken.
Pro tip: Cut your vegetables roughly the same size so they cook evenly. Those baby potatoes should be halved, and your carrots cut thick enough that they won’t turn to mush.
Step 4: The High-Heat Start (15 minutes)
Place your seasoned chicken breast-side up right in the center of your vegetables. Pop it into that hot 450°F oven for exactly 15 minutes. You’ll hear it sizzling – that’s the sound of crispy skin happening!
This initial blast of high heat is what creates that golden, crackling skin we’re after. Don’t open the oven door during this time – you’ll let all that important heat escape.
Step 5: Lower and Slow (45-55 minutes)
After 15 minutes, reduce the oven temperature to 375°F without opening the door. Continue roasting for another 45-55 minutes, depending on the size of your bird.
How to know when it’s done: The internal temperature should reach 165°F when you insert a thermometer into the thickest part of the thigh. The juices should run clear, and honestly, the skin should look absolutely gorgeous – golden brown and crispy.
Step 6: The Rest is Crucial (10 minutes)
This might be the hardest part – let that beautiful chicken rest for 10 minutes before carving. I know it smells incredible and everyone’s hungry, but this resting period allows the juices to redistribute throughout the meat.
Use this time to check your vegetables. They should be tender and caramelized. If they need a few more minutes, pop them back in the oven while the chicken rests.
Chef’s Tips & Variations
Temperature is everything: Invest in a good meat thermometer if you don’t have one. It takes all the guesswork out of roasting chicken and ensures you’ll never serve undercooked or overcooked meat again.
Don’t forget to season the vegetables: I see people focus so much on the chicken that they under-season the vegetables. Those veggies need love too – be generous with salt and pepper!
Make it your own: This recipe is incredibly versatile. Try it with different vegetable combinations based on the season. In fall, I love adding butternut squash and sweet potatoes. Spring calls for asparagus and new potatoes.
Storage and reheating: Leftover roast chicken keeps beautifully in the fridge for up to 4 days. The best way to reheat it is in a 350°F oven for about 10 minutes to re-crisp the skin. The vegetables are delicious cold in salads or reheated as a side dish.
Wine pairing: This pairs beautifully with a crisp Sauvignon Blanc or a light Pinot Noir. If you’re not into wine, a cold beer or sparkling water with lemon is perfect too.
Gravy game-changer: Save those pan drippings! Strain them and use as the base for the most incredible gravy. Just whisk in a bit of flour and chicken stock, and you’ve got liquid gold.
Final Thoughts: You’ve Got This!
There’s something so satisfying about pulling a perfectly roasted chicken out of the oven – the golden skin, the aromatic vegetables, the way it makes your whole kitchen feel like the heart of your home. This recipe might seem a bit involved, but I promise you, once you try it, you’ll understand why it’s become such a staple in my kitchen.
Don’t worry if your first attempt isn’t perfect. Even if the skin isn’t quite as crispy as you’d like or the vegetables are a little more done than ideal, it’s still going to be absolutely delicious. Cooking is all about practice, and every time you make this, you’ll get a little better at reading your oven and timing everything perfectly.
Serve this crispy roast chicken with vegetables alongside some crusty bread to soak up those incredible pan juices, maybe a simple green salad, and you’ve got yourself a meal that’s worthy of any special occasion – or just a regular Tuesday when you want to feel a little fancy.
Trust me, once you master this recipe, Sunday dinners will never be the same. Your family will start requesting it, friends will ask for the recipe, and you’ll feel like the kitchen wizard you were always meant to be. Now go forth and roast that chicken – you’ve absolutely got this!