
Let me tell you about the day I discovered the secret to perfect lemon bars. I was frantically searching for a dessert to bring to my friend’s baby shower, and honestly, I was feeling pretty overwhelmed by all those fancy Pinterest recipes with seventeen ingredients and complicated techniques. Then my grandmother called, and when I mentioned my dessert dilemma, she laughed and said, “Honey, sometimes the simplest things are the most magical.”
She was absolutely right! These lemon bars became my go-to dessert, and I’ve probably made them a hundred times since then. They’re that perfect balance of sweet and tart, with a buttery shortbread crust that practically melts in your mouth and a silky lemon filling that’s like sunshine in dessert form. Trust me, once you master this recipe, you’ll be the person everyone asks to bring dessert!
Table of Contents
What Makes These Lemon Bars Special
These aren’t just any ordinary lemon bars – they’re the kind that disappear from the pan before you can even properly photograph them! The secret is in the technique and the perfect ratio of ingredients. The crust stays crisp even under that luscious lemon filling, and the filling itself has just the right amount of pucker without being mouth-puckeringly sour.
Difficulty Level: Beginner-friendly (seriously, if I can make them, anyone can!)
Total Time: About 1 hour (plus cooling time)
Servings: 16 generous squares
What I love most about this recipe is that it uses simple, everyday ingredients that you probably already have in your kitchen. No fancy equipment needed – just a standard 9×13 pan and a little bit of love.
Ingredients
For the Shortbread Crust:
- 2 cups all-purpose flour
- 1/2 cup powdered sugar
- 1/2 teaspoon salt
- 1 cup (2 sticks) unsalted butter, cold and cubed
- 1 teaspoon vanilla extract
For the Lemon Filling:
- 4 large eggs
- 1 1/3 cups granulated sugar
- 1/4 cup all-purpose flour
- 1/2 cup fresh lemon juice (about 3-4 large lemons)
- 2 tablespoons lemon zest
- 1/4 teaspoon salt
For Finishing:
- Powdered sugar for dusting
Pro tip: Always use fresh lemons for the best flavor! Those little plastic lemon-shaped bottles just can’t compete with the real deal. I like to zest my lemons before juicing them – it’s so much easier that way.
Ingredient Notes: If you only have salted butter on hand, just reduce the salt in the crust by half. The recipe is pretty forgiving! For the flour in the filling, make sure to measure it accurately – too much and your filling will be thick and cake-like instead of silky smooth.

Cooking Method
Step 1: Prep Your Kitchen (5 minutes)
Preheat your oven to 350°F and line a 9×13 inch baking pan with parchment paper, leaving some overhang for easy removal. This is where the magic begins! I always spray my parchment with a little cooking spray too – it’s like insurance against sticking.
Step 2: Make the Crust (15 minutes)
In a large bowl, whisk together flour, powdered sugar, and salt. Add those cold butter cubes and use a pastry cutter or your hands to work it in until the mixture looks like coarse crumbs with some larger butter pieces. Don’t worry about making it perfectly uniform – those little butter chunks will create the most amazing flaky texture!
Add vanilla extract and mix just until the dough starts to come together. It should hold together when you squeeze it, but still look a bit crumbly.
Press this mixture firmly and evenly into your prepared pan. Here’s the secret: Use the bottom of a measuring cup to really pack it down. You want it nice and compact so it doesn’t fall apart later.
Bake for 18-20 minutes until the edges are just starting to turn golden. Don’t let it get too brown – we’re going for a light golden color.
Step 3: Prepare the Lemon Filling (10 minutes)
While your crust is baking, whisk together eggs and granulated sugar in a large bowl until well combined. Add flour and whisk until smooth – make sure there are no lumps hiding in there!
Add fresh lemon juice, lemon zest, and salt. Whisk everything together until it’s beautifully smooth and bright yellow. The smell alone will make you happy!
Pro tip: Strain your filling through a fine-mesh sieve if you want it extra silky. I usually skip this step because I’m impatient, but it does make a difference if you’re going for perfection!
Step 4: Assembly and Final Bake (25 minutes)
As soon as your crust comes out of the oven, pour the lemon filling right over the hot crust. This is where the magic happens – the hot crust helps set the bottom of the filling immediately.
Return to the oven and bake for 22-25 minutes, until the filling is set and no longer jiggly in the center. You’ll know it’s done when you can gently shake the pan and the center doesn’t wobble.
Step 5: The Waiting Game (2+ hours)
This is honestly the hardest part – letting them cool completely! I know it’s tempting to cut into them while they’re warm, but trust me on this one. They need at least 2 hours to cool completely, and they’re even better after chilling in the fridge for a bit.
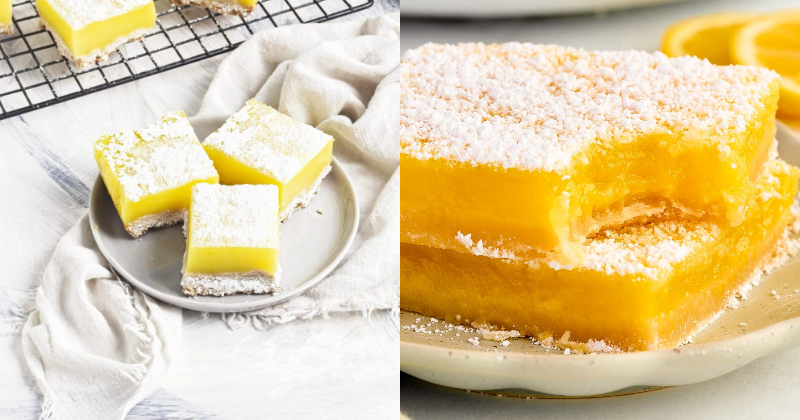
Once they’re completely cool, use the parchment paper overhang to lift them out of the pan. Dust generously with powdered sugar and cut into squares with a sharp knife.
Chef’s Tips & Variations
Storage Magic: These lemon bars actually taste better the next day! Store them covered in the refrigerator for up to a week. The flavors meld together beautifully overnight.
Serving Suggestions: I love serving these with fresh berries or a dollop of whipped cream. They’re perfect for picnics, potlucks, or just because it’s Tuesday and you deserve something sweet!
Flavor Variations: Try lime instead of lemon for a tropical twist, or add a tablespoon of fresh thyme to the crust for something really special. I’ve also made them with Meyer lemons when they’re in season – absolutely divine!
Make-Ahead Tips: You can make the crust up to two days ahead and store it covered at room temperature. The finished bars freeze beautifully for up to three months – just thaw overnight in the fridge and dust with fresh powdered sugar before serving.
Troubleshooting: If your filling seems too thick, you might have added too much flour. If it’s too thin, just bake it a few minutes longer. And if your crust gets too brown, tent it with foil during the final baking time.
Pro tip: Room temperature eggs mix more easily, so take them out about 30 minutes before you start baking. If you forget (like I always do), just place them in a bowl of warm water for 5 minutes.
Final Thoughts
There’s something so satisfying about pulling a pan of perfect lemon bars out of the oven. The way that golden filling contrasts with the pale crust, the incredible citrus aroma filling your kitchen – it’s pure joy in dessert form!
Don’t be intimidated if you’re new to baking. This recipe is incredibly forgiving, and even if they don’t look Instagram-perfect, they’ll still taste absolutely amazing. I’ve made these bars in tiny apartment kitchens and spacious suburban ones, and they turn out beautifully every single time.
So grab some lemons, preheat that oven, and get ready to become everyone’s favorite person! These lemon bars are perfect for everything from casual coffee dates to fancy dinner parties. Serve them at your next gathering and watch as people ask for the recipe – you’ll feel like such a kitchen rockstar!
Remember, the best part about homemade desserts isn’t perfection – it’s the love you put into them. So have fun with it, taste-test along the way (quality control is very important!), and don’t forget to save a piece for yourself before they all disappear. You’ve got this!