
IThere’s something absolutely magical about capturing the essence of peak summer strawberries in a simple jar of homemade freezer jam. I’ll never forget the first time my grandmother taught me this recipe during a sweltering July afternoon when her strawberry patch was overflowing with the most gorgeous, ruby-red berries I’d ever seen. She showed me how to make this strawberry freezer jam without any fancy canning equipment or intimidating water bath procedures.
What makes this recipe so special is its incredible fresh strawberry flavor – it tastes like you’re biting into a perfectly ripe strawberry even in the dead of winter. Unlike traditional cooked jams that can lose some of their bright, vibrant taste during the heating process, this freezer jam preserves all those beautiful strawberry notes. Trust me, once you taste the difference, you’ll never go back to store-bought jam again. Plus, it’s surprisingly simple to make, even if you’ve never attempted any kind of jam-making before.
Table of Contents
Why Strawberry Freezer Jam is a Game-Changer
Strawberry freezer jam is essentially fresh strawberries transformed into spreadable perfection without cooking them to death. The process involves mashing fresh berries with sugar and pectin, then letting the mixture set up in your freezer. What you get is a jam that tastes remarkably close to fresh strawberries – bright, sweet, and bursting with that unmistakable summer flavor.
This isn’t your grandmother’s traditional canning project that requires special equipment and hours of work. This easy strawberry jam recipe takes about 30 minutes from start to finish, and most of that time is just waiting for the mixture to thicken. The difficulty level? Absolute beginner-friendly. If you can mash berries and stir, you’ve got this!
The beauty of homemade freezer jam lies in its simplicity and the fact that you control every single ingredient. No artificial preservatives, no high fructose corn syrup – just pure strawberry goodness.
Ingredients for Perfect Strawberry Freezer Jam
Makes approximately 5 cups of jam
- 4 cups fresh strawberries, hulled and mashed (about 2 pounds whole berries)
- 4 cups granulated sugar
- 1 package (1.75 oz) powdered fruit pectin (like Sure-Jell)
- 1/4 cup fresh lemon juice
- 1/2 cup water
Ingredient Tips and Substitutions
Here’s where I share some secrets I’ve learned over the years. For the best strawberry freezer jam, choose berries that are fully ripe but not mushy. They should smell incredibly fragrant – if you can’t smell that gorgeous strawberry aroma, they won’t make great jam.
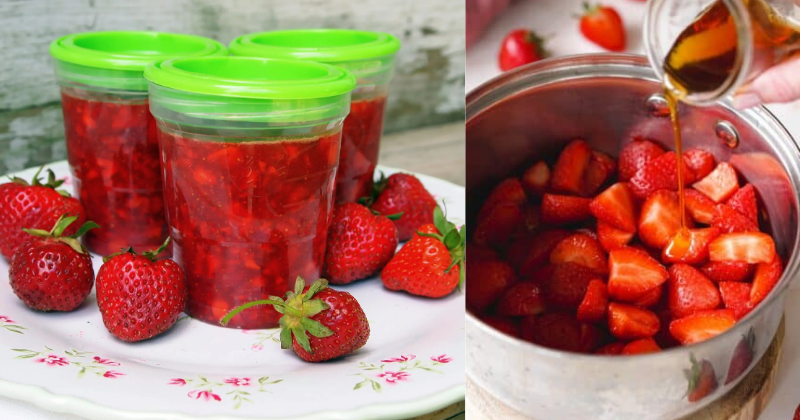
Pro tip: Don’t be tempted to reduce the sugar significantly. I know it seems like a lot, but sugar isn’t just for sweetness here – it’s crucial for the jam’s texture and preservation. However, you can substitute up to half the sugar with honey if you prefer.
The lemon juice is non-negotiable. It helps the pectin set properly and adds a bright note that makes the strawberry flavor pop. Fresh lemon juice works best, but bottled will do in a pinch.
Step-by-Step Instructions for Strawberry Freezer Jam
Step 1: Prepare Your Strawberries
Start by washing your strawberries gently under cool water. Remove the green tops and any bruised areas. Now comes the fun part – mashing! I like to use a potato masher and leave some small chunks for texture, but you can make it as smooth or chunky as you prefer.
Trust me on this: Don’t use a food processor unless you want strawberry puree. The beauty of homemade strawberry jam is having those lovely berry pieces throughout.
Step 2: Mix Strawberries and Sugar
In a large bowl, combine your mashed strawberries with the 4 cups of sugar. Stir thoroughly and let this mixture sit for about 10 minutes. This is where the magic starts happening – the sugar begins drawing out the strawberry juices, creating that beautiful syrup base.
Don’t worry if it looks like way too much sugar at first. The strawberries will release their juices, and everything will come together beautifully.
Step 3: Prepare the Pectin Mixture
While your strawberries are getting acquainted with the sugar, combine the powdered pectin with 1/2 cup water in a small saucepan. Bring this mixture to a rolling boil, stirring constantly. Let it boil hard for exactly one minute, then remove from heat.
Here’s the secret: Make sure you get that full rolling boil – the kind that doesn’t stop bubbling even when you stir it. This activates the pectin properly.
Step 4: Combine Everything
Add the hot pectin mixture and lemon juice to your strawberry-sugar mixture. Stir continuously for about 3 minutes. You’ll notice the mixture starting to thicken slightly, but don’t expect it to be jam-thick yet – that happens in the freezer.
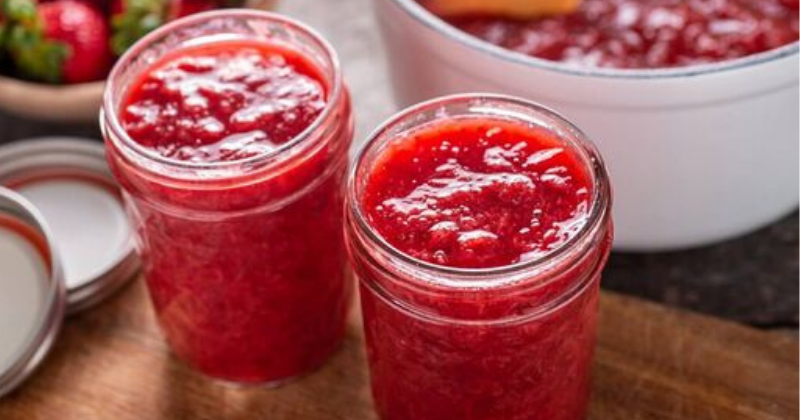
Step 5: Fill Your Containers
Ladle your strawberry freezer jam into clean containers, leaving about 1/2 inch of headspace at the top. I love using mason jars, but any freezer-safe containers work perfectly. Glass jars, plastic containers, even heavy-duty freezer bags will do the trick.
Pro tip: Label everything with the date and contents. Future you will thank present you when you’re digging through the freezer in February!
Step 6: Set and Store
Let your containers sit at room temperature for about 24 hours until the jam is set and gel-like. Then pop them in the freezer for long-term storage, or keep one in the refrigerator for immediate use.
Chef’s Tips and Variations
After making countless batches of strawberry freezer jam, I’ve picked up some tricks that make all the difference. First, timing matters when buying strawberries. Peak strawberry season varies by location, but generally, late spring through early summer gives you the best flavor and value.
Storage wisdom: This jam keeps beautifully in the freezer for up to a year, though I guarantee it won’t last that long. In the refrigerator, it’s good for about 3 weeks once opened. The texture might change slightly after freezing, but the flavor remains incredible.
For variations, try adding a teaspoon of vanilla extract or a tablespoon of balsamic vinegar for depth. A handful of finely chopped fresh basil creates an sophisticated twist that’s absolutely divine on goat cheese and crackers.
Troubleshooting tip: If your jam doesn’t set properly after 24 hours, it’s usually because the pectin didn’t boil long enough or the measurements were off. Don’t panic – you can re-make it by adding more activated pectin.
This easy strawberry jam pairs beautifully with everything from morning toast to afternoon scones. I love it swirled into yogurt, spooned over vanilla ice cream, or used as a filling for thumbprint cookies during the holidays.
Final Thoughts on Your Strawberry Freezer Jam Adventure
Making your own strawberry freezer jam is one of those simple pleasures that connects us to the seasons and to generations of home cooks before us. There’s something deeply satisfying about opening a jar of your homemade jam on a snowy morning and tasting that burst of summer sunshine.
This recipe has become a beloved tradition in my kitchen, and I have a feeling it’ll become one in yours too. The process is forgiving, the results are consistently delicious, and you’ll feel incredibly accomplished every time you spread that gorgeous, chunky jam on your morning toast.
So grab those beautiful strawberries while they’re at their peak, roll up your sleeves, and dive into this homemade strawberry freezer jam adventure. Your taste buds – and your freezer – will thank you. And who knows? Maybe you’ll start your own summer tradition of capturing the season’s sweetest moments, one jar at a time.