
Let me tell you about the day I cracked the code on these incredible cheddar biscuits! I was sitting at Red Lobster, absolutely demolishing their famous biscuits (as one does), when I thought to myself, “There has to be a way to make these at home.” After countless kitchen experiments and maybe a few tears over collapsed biscuits, I finally nailed it. These homemade cheddar biscuits are so close to the original, you’ll think you smuggled them out of the restaurant!
What makes this recipe so special? It’s all about that perfect balance of buttery, flaky layers with sharp cheddar cheese and just a hint of garlic. The secret is in the technique – we’re treating these like proper biscuits, not just cheesy drop cookies. Trust me, once you master this recipe, you’ll never need to wait for a Red Lobster visit to satisfy those cravings again!
Table of Contents
Recipe Overview
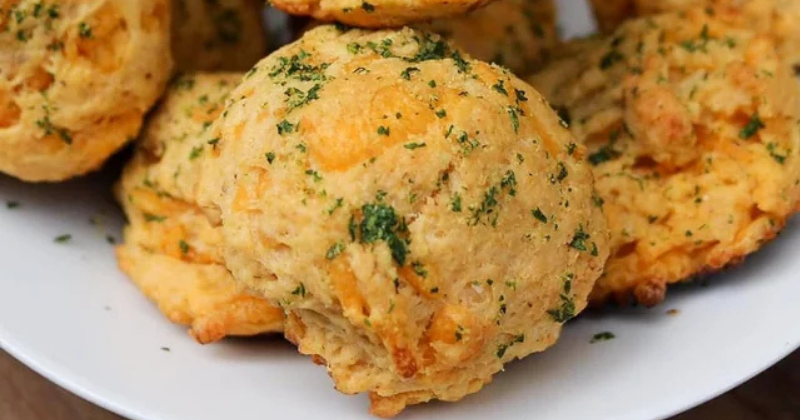
These cheddar bay biscuits are the perfect combination of tender, flaky interior and golden, cheesy exterior. What makes them unique is the drop-biscuit method combined with that signature garlic butter brush that gets applied twice – once before baking and once after. It’s like a warm hug from your favorite seafood restaurant!
Difficulty Level: Easy to Medium (don’t let the technique intimidate you!) Total Time: 30 minutes Prep Time: 15 minutes Bake Time: 12-15 minutes Serves: 8-10 biscuits
The beauty of this recipe is that it’s forgiving. Even if your biscuits look a little rustic, they’ll taste absolutely incredible. Sometimes the most imperfect-looking biscuits are the most delicious ones!
Ingredients
For the Biscuits:
- 2 cups all-purpose flour
- 1 tablespoon sugar
- 1 tablespoon baking powder
- 1 teaspoon garlic powder
- 1 teaspoon salt
- 1/4 teaspoon cayenne pepper (optional, but I love the tiny kick!)
- 6 tablespoons cold unsalted butter, cubed
- 1 cup sharp cheddar cheese, freshly grated
- 3/4 cup cold buttermilk
- 1/4 cup sour cream
For the Garlic Butter Topping:
- 4 tablespoons unsalted butter, melted
- 2 cloves garlic, minced
- 1/4 teaspoon dried parsley
- Pinch of salt
Ingredient Tips: Always use cold butter – this is non-negotiable! The cold fat creates those beautiful flaky layers. And please, please grate your own cheese. Pre-shredded cheese has anti-caking agents that prevent it from melting properly. Fresh is always best!
Substitution Notes: No buttermilk? Mix 3/4 cup regular milk with 1 tablespoon white vinegar and let it sit for 5 minutes. Want extra tang? Swap the sour cream for Greek yogurt.
Cooking Method
Step 1: Prep Your Workspace Preheat your oven to 425°F and line a baking sheet with parchment paper. This high temperature is crucial for getting that golden, crispy exterior while keeping the inside tender.
Step 2: Mix the Dry Ingredients In a large bowl, whisk together flour, sugar, baking powder, garlic powder, salt, and cayenne. Pro tip: I like to use a fine-mesh sieve to ensure everything is evenly distributed. Those little pockets of baking powder can create uneven rise!
Step 3: Cut in the Cold Butter Add your cold, cubed butter to the flour mixture. Using a pastry cutter or two forks, cut the butter into the flour until the mixture resembles coarse crumbs with some pea-sized butter pieces. Don’t worry if it looks messy – those butter chunks are what create the flaky texture! This is where the magic starts happening.
Step 4: Add the Cheese Fold in the grated cheddar cheese, making sure it’s evenly distributed. I love using a mix of sharp and extra-sharp cheddar for maximum flavor impact.
Step 5: Create the Wet Mixture In a separate bowl, whisk together the cold buttermilk and sour cream. The sour cream adds incredible tenderness and a subtle tang that makes these biscuits irresistible.
Step 6: Bring It All Together Pour the buttermilk mixture into the flour mixture. Using a fork, gently stir until the dough just comes together. Don’t overmix! The dough should look shaggy and slightly sticky. If it seems too dry, add buttermilk one tablespoon at a time.
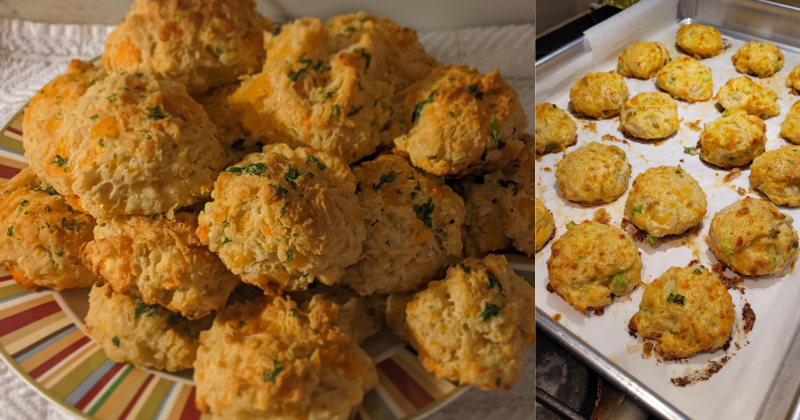
Step 7: Shape the Biscuits Using a large spoon or ice cream scoop, drop generous portions of dough onto your prepared baking sheet, spacing them about 2 inches apart. They should look rustic and irregular – that’s exactly what we want! Don’t try to make them perfect; embrace the homemade charm.
Step 8: Prepare the Garlic Butter While you’re shaping biscuits, melt the butter for the topping and stir in minced garlic, parsley, and a pinch of salt. The aroma alone will make your kitchen smell like heaven!
Step 9: First Brush Brush the tops of each biscuit with half of the garlic butter mixture before baking. This creates an incredible golden crust and infuses flavor right into the biscuit.
Step 10: Bake to Perfection Bake for 12-15 minutes, until the tops are golden brown and the biscuits have puffed beautifully. Don’t open the oven door during the first 10 minutes – we need that consistent heat to create the rise!
Step 11: Final Touch As soon as they come out of the oven, brush with the remaining garlic butter. Listen to that sizzle – that’s the sound of perfection! The hot biscuits will absorb all those buttery, garlicky flavors.
Chef’s Tips & Variations
Pro Tips for Perfect Biscuits:
- Temperature is everything! Keep your ingredients cold until the moment you use them. I sometimes even chill my mixing bowl.
- Don’t overwork the dough. The more you handle it, the tougher your biscuits will be. Treat it like you’re handling a delicate flower.
- Size matters. Make them generous! These should be substantial, restaurant-style biscuits, not dainty tea biscuits.
Flavor Variations: Want to switch things up? Try adding chopped fresh chives or crispy bacon bits to the dough. For a spicier version, increase the cayenne or add a pinch of smoked paprika. I’ve even made a version with Gruyère and herbs that was absolutely divine!
Storage and Reheating: These biscuits are best served warm from the oven, but leftovers can be stored in an airtight container for up to 2 days. To reheat, wrap in a damp paper towel and microwave for 15-20 seconds, or pop them in a 350°F oven for 5 minutes. They’ll taste almost as good as fresh!
Make-Ahead Magic: You can prepare the dough up to 2 hours ahead and keep it covered in the refrigerator. Just scoop and bake when you’re ready. The cold dough actually creates even flakier layers!
Perfect Pairings: These cheddar bay biscuits are incredible with seafood (obviously!), but they’re equally amazing with fried chicken, hearty soups, or even just a simple green salad. I love serving them at brunch with scrambled eggs and crispy bacon.
Conclusion
There’s something truly magical about pulling a batch of these golden, cheesy biscuits from your own oven. The way they smell, the way they look with that gorgeous golden crust, and especially the way they taste – warm, buttery, and loaded with sharp cheddar flavor. It’s comfort food at its absolute finest.
Don’t be intimidated by the technique! Yes, there are a few steps, but each one builds on the last to create something truly special. The first time you bite into one of these homemade Red Lobster-style biscuits, you’ll understand why they’re worth the effort.
So grab your apron, preheat that oven, and get ready to become the hero of your next family dinner. These biscuits have a way of making any meal feel like a celebration. Trust me, once you master this recipe, you’ll find excuses to make them all the time. And honestly? Your kitchen will never smell better!
Give this recipe a try and let me know how they turn out – I have a feeling you’re going to fall in love with these just like I did. Happy baking!