
Let me tell you about the chocolate cake that changed everything for me. It was my grandmother’s 80th birthday, and I was desperately searching for the perfect dessert recipe that would make her day extra special. After three failed attempts with overly complicated recipes, I stumbled upon this incredibly simple yet absolutely divine chocolate cake formula. The moment I pulled it from the oven, the entire kitchen smelled like pure chocolate heaven, and when we cut into it later that evening, the moist, rich crumb had everyone asking for seconds (and thirds!).
This isn’t just any chocolate cake – it’s the kind that makes people close their eyes on the first bite and let out that little “mmm” sound. The texture is perfectly tender and moist, the chocolate flavor is deep and satisfying without being overwhelming, and the best part? It’s surprisingly easy to make, even for beginner bakers. Whether you’re celebrating a special occasion or just need a midweek chocolate fix, this recipe will become your go-to crowd-pleaser.
Table of Contents
Recipe Overview
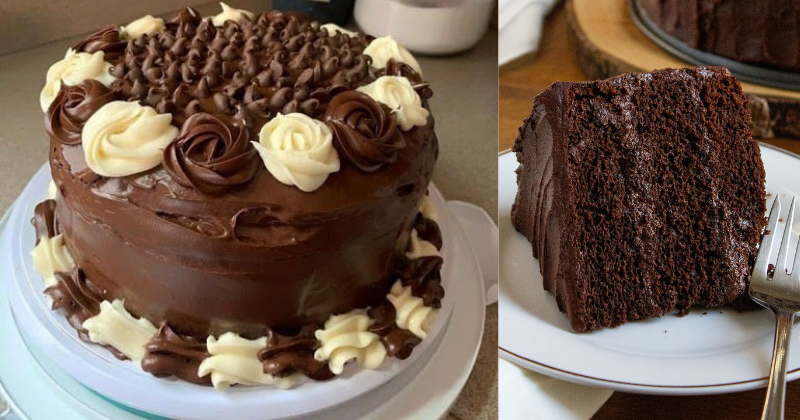
This delicious chocolate cake is what I like to call the “perfect storm” of chocolate desserts. It combines the rich, fudgy texture of a brownie with the light, airy crumb of a classic layer cake. What makes this recipe truly special is the addition of hot coffee to the batter – don’t worry, you won’t taste the coffee, but it amplifies the chocolate flavor in the most incredible way.
Difficulty Level: Beginner-friendly
Total Time: 1 hour 15 minutes (including baking)
Prep Time: 20 minutes
Baking Time: 35-40 minutes
Serves: 12-16 generous slices
The magic of this recipe lies in its simplicity and the fact that you probably have most of these ingredients in your pantry right now. It’s the kind of recipe that saves the day when unexpected guests arrive or when you need to bring a dessert to a potluck.
Ingredients
For the Chocolate Cake:
- 1¾ cups all-purpose flour
- 2 cups granulated sugar
- ¾ cup unsweetened cocoa powder (Dutch-processed preferred)
- 2 teaspoons baking soda
- 1 teaspoon baking powder
- 1 teaspoon salt
- 2 large eggs, room temperature
- 1 cup buttermilk, room temperature
- 1 cup hot strong coffee (or hot water if you prefer)
- ½ cup vegetable oil
- 1 teaspoon vanilla extract
For the Classic Chocolate Frosting:
- ½ cup unsalted butter, softened
- ⅔ cup cocoa powder
- 3 cups powdered sugar
- ⅓ cup milk (more as needed)
- 1 teaspoon vanilla extract
Pro tip: Room temperature ingredients are your secret weapon for a perfectly smooth batter. Take your eggs and buttermilk out about an hour before you start baking – trust me on this one!
Ingredient Substitutions: If you don’t have buttermilk on hand, simply add 1 tablespoon of white vinegar or lemon juice to 1 cup of regular milk and let it sit for 5 minutes. For a dairy-free version, substitute the buttermilk with non-dairy milk mixed with vinegar, and use coconut oil instead of vegetable oil.

Cooking Method
Step 1: Prep Your Kitchen
Preheat your oven to 350°F (175°C) and grease two 9-inch round cake pans. Here’s where I learned something the hard way – don’t just grease them, line the bottoms with parchment paper too. This little extra step ensures your cake comes out perfectly every single time, and you’ll thank me later when you’re not trying to scrape stuck cake bits from your pan!
Step 2: Mix the Dry Ingredients
In a large mixing bowl, whisk together flour, sugar, cocoa powder, baking soda, baking powder, and salt. Make sure you really whisk this well – I like to do about 20-30 good whisks to ensure everything is evenly distributed. This is where the magic starts building, and you’ll already start smelling that gorgeous chocolate aroma.
Step 3: Combine the Wet Ingredients
In a separate bowl, whisk together the eggs, buttermilk, vegetable oil, and vanilla extract until smooth. The mixture should look creamy and well-combined. Don’t worry if it looks a bit lumpy at first – just keep whisking!
Step 4: The Coffee Secret
Brew your coffee strong and hot. This is the secret ingredient that elevates this chocolate cake from good to absolutely incredible. The coffee doesn’t make the cake taste like coffee – instead, it deepens and intensifies the chocolate flavor in a way that’s pure magic. If you’re not a coffee drinker, hot water works too, but trust me, the coffee makes all the difference.
Step 5: Bring It All Together
Pour the wet ingredients into the dry ingredients and stir until just combined. The batter will look a bit lumpy, and that’s perfectly fine – overmixing is the enemy of tender cake! Now comes the fun part: slowly pour in that hot coffee while stirring. The batter will become quite thin, and you might panic thinking something’s wrong. Don’t worry – this thin consistency is exactly what creates that incredibly moist texture we’re after.
Step 6: Bake to Perfection
Divide the batter evenly between your prepared pans. A kitchen scale is helpful here, but if you don’t have one, just eyeball it – it doesn’t have to be perfect. Bake for 35-40 minutes, or until a toothpick inserted in the center comes out with just a few moist crumbs clinging to it.
Here’s the thing about checking for doneness: don’t open that oven door before 30 minutes! I know it’s tempting, but opening the door too early can cause the cake to sink. When you do check, look for that perfect toothpick test – completely clean means overbaked, while wet batter means it needs more time.
Step 7: Cool Like a Pro
Let the cakes cool in their pans for 10 minutes, then turn them out onto wire racks to cool completely. This waiting period is torture, I know, but it’s crucial for the perfect texture and for frosting success later.
Step 8: Make the Frosting
While your cakes are cooling, make the frosting. Beat the softened butter until light and fluffy (about 3-4 minutes), then gradually add the cocoa powder. Alternate adding powdered sugar and milk, beating well after each addition. Add vanilla extract and beat until the frosting is smooth and spreadable. If it’s too thick, add a little more milk; if too thin, add more powdered sugar.
Step 9: Assembly Time
Once your cakes are completely cool, place one layer on your serving plate. Spread about ⅓ of the frosting on top, then gently place the second layer on top. Use the remaining frosting to cover the top and sides. Don’t stress about making it perfect – rustic charm is totally in!
Chef’s Tips & Variations
Pro tip: The secret to the most incredible chocolate flavor is using quality cocoa powder. Dutch-processed cocoa gives a deeper, richer taste, but natural cocoa works beautifully too. I always keep both types in my pantry because the difference really shows in recipes like this.
Make-Ahead Magic: This cake actually gets better after a day! The flavors meld together beautifully, and the texture becomes even more moist. You can bake the layers up to 2 days ahead, wrap them tightly in plastic wrap, and store at room temperature. The frosted cake keeps covered at room temperature for up to 3 days.
Flavor Variations: Want to jazz things up? Try adding a teaspoon of espresso powder to intensify the chocolate even more, or fold in a cup of chocolate chips for extra indulgence. For a fun twist, add a tablespoon of raspberry jam between the layers – chocolate and raspberry are match made in heaven!
Storage Wisdom: Store your finished cake covered at room temperature for up to 4 days, or in the refrigerator for up to a week. If you refrigerate it, let it come to room temperature for about 30 minutes before serving for the best texture and flavor.
Serving Suggestions: This cake is absolutely perfect on its own, but it’s also incredible with fresh berries, a scoop of vanilla ice cream, or even a dollop of whipped cream. For special occasions, I love to dust the top with a little powdered sugar or add some chocolate shavings for an elegant finish.
Troubleshooting: If your cake turns out dense, you likely overmixed the batter or your leavening agents might be old. If it’s dry, it was probably overbaked – remember, a few moist crumbs on the toothpick are perfect! And if the frosting seems too sweet, add a pinch of salt to balance it out.
Final Thoughts
There’s something truly magical about pulling a homemade chocolate cake from the oven and watching the faces of the people you love light up with anticipation. This recipe has been my go-to for birthday parties, potluck dinners, random Tuesday nights when we all need a little sweetness, and every occasion in between.
The beauty of this delicious chocolate cake lies not just in its incredible taste, but in its reliability. It works every single time, whether you’re a seasoned baker or someone who’s just starting their baking journey. The ingredients are simple, the method is straightforward, and the results are consistently spectacular.
So go ahead, preheat that oven and give this recipe a try. Whether you’re celebrating something special or just because it’s Tuesday and you deserve cake, this recipe will deliver that perfect moment of chocolate bliss. And don’t forget to make it your own – baking is all about love, creativity, and the joy of sharing something delicious with the people who matter most.
Your kitchen is about to smell absolutely amazing, and your taste buds are in for the treat of a lifetime. You’ve totally got this!