
Let me tell you about the day I discovered that my air fryer could turn humble zucchini into crispy, addictive chips. I was drowning in zucchini from my garden (you know how it is – one day you have three zucchini, the next day you have thirty), and I was desperate to find something more exciting than another loaf of zucchini bread. That’s when I decided to experiment with my air fryer, and honestly, it was a game-changer.
These air fryer zucchini chips are crispy, flavorful, and satisfy that crunch craving without any of the guilt. They’re perfect for when you want something salty and satisfying but don’t want to reach for a bag of potato chips. Trust me, once you master this technique, you’ll be making these weekly – they’re that good!
Table of Contents
What Makes These Zucchini Chips Special
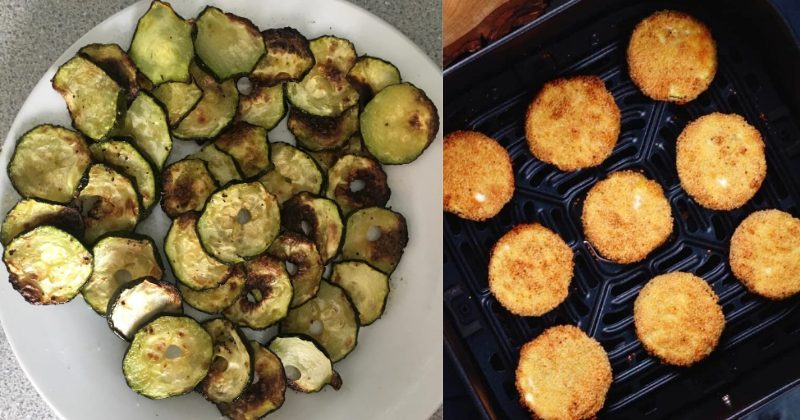
These aren’t your soggy, disappointing baked zucchini chips that fall apart when you touch them. The air fryer creates the perfect environment for achieving that coveted crispy texture while keeping the inside tender. The secret is in the preparation – we’re going to draw out the moisture from the zucchini first, then coat them just right for maximum crispiness.
Difficulty Level: Easy (perfect for beginners!)
Total Time: 45 minutes (including prep time)
Active Cooking Time: 15 minutes
Serves: 3-4 people as a snack
What I love most about this recipe is how versatile it is. You can season these chips however you like – from simple salt and pepper to more adventurous flavors like parmesan and herbs or even a spicy kick with paprika and cayenne.
Ingredients You’ll Need
For the Zucchini Chips:
- 2 medium zucchini (about 1 pound total)
- 1 teaspoon salt (for drawing out moisture)
- 1/2 cup all-purpose flour
- 2 large eggs, beaten
- 1 cup panko breadcrumbs
- 1/2 cup grated Parmesan cheese
- 1 teaspoon garlic powder
- 1/2 teaspoon onion powder
- 1/4 teaspoon black pepper
- Cooking spray or olive oil spray
Pro tip: Choose zucchini that are firm and not too large – the smaller ones tend to have fewer seeds and less water content, which means crispier chips!
Ingredient Notes & Substitutions:
- Zucchini: Look for medium-sized zucchini that feel heavy for their size. Avoid any that feel spongy or have soft spots.
- Panko breadcrumbs: These are crucial for the crispy texture! Regular breadcrumbs work but won’t give you that same satisfying crunch.
- Parmesan cheese: Fresh grated works best, but the pre-grated stuff from the store works too. For a dairy-free version, try nutritional yeast.
- Flour: You can substitute with almond flour for a gluten-free option, though the texture will be slightly different.

Step-by-Step Cooking Instructions
Step 1: Prep Your Zucchini (15 minutes)
Start by washing your zucchini thoroughly and trimming off both ends. Here’s where technique matters – slice your zucchini into rounds about 1/4 inch thick. Not too thin (they’ll fall apart) and not too thick (they won’t get crispy). I like to use a mandoline slicer for perfectly even slices, but a sharp knife works just fine.
Lay the zucchini slices on a large baking sheet or clean kitchen towels and sprinkle both sides generously with salt. Let them sit for 15 minutes – this is where the magic happens! The salt draws out excess moisture, which is the enemy of crispy chips.
Trust me on this step – don’t skip the salting time. I learned this the hard way when I was impatient and ended up with soggy chips that made me question my life choices.
Step 2: Set Up Your Breading Station (5 minutes)
While your zucchini is doing its thing, set up three shallow dishes:
- Dish 1: All-purpose flour
- Dish 2: Beaten eggs
- Dish 3: Mix together panko breadcrumbs, Parmesan cheese, garlic powder, onion powder, and black pepper
After 15 minutes, pat the zucchini slices completely dry with paper towels. Seriously, get them as dry as possible – this is crucial for achieving that perfect crispy texture.
Step 3: The Breading Process (10 minutes)
Here’s where things get a little messy, but it’s so worth it! Working with one slice at a time:
- Dredge the zucchini slice in flour, shaking off excess
- Dip into beaten egg, letting excess drip off
- Press firmly into the breadcrumb mixture, making sure both sides are well coated
Pro tip: Use one hand for wet ingredients and one for dry to avoid creating cement mittens on your fingers. Place the breaded slices on a clean plate as you go.
Step 4: Air Frying Time (12-15 minutes)
Preheat your air fryer to 400°F (200°C) for 3 minutes. Lightly spray the air fryer basket with cooking spray to prevent sticking.
Arrange the breaded zucchini slices in a single layer in the air fryer basket. Don’t overcrowd them – you might need to work in batches. Lightly spray the tops of the zucchini chips with cooking spray.
Cook for 6 minutes, then carefully flip each chip and spray the other side. Cook for another 6-8 minutes until golden brown and crispy. The exact time might vary depending on your air fryer model, so keep an eye on them during the last few minutes.
Don’t worry if some of the breading falls off during flipping – it happens to the best of us! The important thing is that beautiful golden color and crispy sound when you tap them with a fork.
Chef’s Tips & Variations
Storage & Reheating: These chips are best enjoyed immediately while they’re at peak crispiness, but you can store leftovers in the refrigerator for up to 2 days. To reheat, pop them back in the air fryer at 350°F for 2-3 minutes to restore some of that crunch.
Flavor Variations:
- Italian Style: Add dried Italian herbs and extra Parmesan to the breadcrumb mixture
- Spicy Kick: Mix in cayenne pepper, paprika, and a pinch of chili flakes
- Ranch Style: Add dried dill, onion powder, and garlic powder for that classic ranch flavor
- Everything Bagel: Use everything bagel seasoning in place of some of the other seasonings
Serving Suggestions: These zucchini chips are incredible on their own, but they’re also fantastic with:
- Ranch dressing for dipping (the classic choice)
- Marinara sauce for an Italian twist
- Tzatziki for a Mediterranean vibe
- Sriracha mayo for those who like a little heat
Pro Tips for Success:
- Size matters: Keep your slices uniform for even cooking
- Don’t skip the salt step: It’s the difference between soggy and crispy
- Work in batches: Overcrowding leads to uneven cooking
- Watch the timing: Air fryers can vary, so check your chips at the 10-minute mark
Make-Ahead Option: You can bread the zucchini slices up to 2 hours ahead and keep them in the refrigerator. Just air fry them when you’re ready to serve – perfect for entertaining!
Final Thoughts
These air fryer zucchini chips have become my go-to healthy snack, and I’m betting they’ll become yours too. There’s something so satisfying about transforming a simple vegetable into something that feels indulgent but is actually packed with nutrients.
The best part? Once you master this basic technique, you can apply it to other vegetables too. I’ve had great success with yellow squash, eggplant, and even cauliflower using the same method.
You’ve got this! Even if your first batch isn’t perfect, don’t get discouraged. Like any cooking technique, it gets better with practice. And trust me, even slightly imperfect zucchini chips are still pretty darn delicious.
Give these a try the next time you’re craving something crunchy and satisfying. Your taste buds (and your waistline) will thank you. And if you’re like me and end up with a zucchini surplus from your garden, well, now you know exactly what to do with them!
Serve these alongside your favorite dipping sauce, or just enjoy them straight from the air fryer basket while they’re still warm and crispy. Happy cooking!