

I’ll never forget the first time I attempted homemade cinnamon rolls. It was a snowy Saturday morning, and I was craving that bakery-style goodness but didn’t want to brave the weather. What started as a simple weekend experiment turned into the most requested recipe in my household! These cinnamon rolls are everything you dream of – pillowy soft, swirled with buttery cinnamon sugar, and topped with the most luxurious cream cheese frosting. Trust me, once you make these from scratch, you’ll never go back to store-bought. The house will smell absolutely incredible, and you’ll feel like a total baking rockstar. Plus, there’s something so satisfying about watching that dough rise and transform into golden, gooey perfection!
Table of Contents
Recipe Overview
These homemade cinnamon rolls are the perfect balance of tender, fluffy bread and rich, sweet filling. What makes this recipe special is the overnight rise option – you can prep them the night before and wake up to fresh-baked rolls! The secret is in the enriched yeast dough that creates those signature soft layers, while the brown butter in the filling adds an extra depth of flavor that’ll have everyone asking for your secret.
Difficulty Level: Intermediate (but totally doable!)
Total Time: 4-5 hours (including rise time) or overnight prep
Active Time: 45 minutes
Serves: 12 generous rolls
Ingredients
For the Dough:
- 4 cups all-purpose flour (plus extra for dusting)
- 1 packet (2¼ tsp) active dry yeast
- 1 cup whole milk, warmed to 110°F
- ⅓ cup granulated sugar
- ⅓ cup unsalted butter, melted
- 1 large egg, room temperature
- 1 teaspoon salt
For the Cinnamon Filling:
- ½ cup unsalted butter, softened (or slightly browned for extra flavor!)
- ¾ cup packed brown sugar
- 2 tablespoons ground cinnamon
- Pinch of salt
For the Cream Cheese Frosting:
- 4 oz cream cheese, softened
- ¼ cup unsalted butter, softened
- 1½ cups powdered sugar
- 2-3 tablespoons milk
- 1 teaspoon vanilla extract
- Pinch of salt
Pro tip: Make sure your butter and cream cheese are truly at room temperature – this makes all the difference in achieving that smooth, spreadable consistency!
Cooking Method
Step 1: Activate the Yeast (10 minutes)
In a small bowl, combine the warm milk and a pinch of sugar. Sprinkle the yeast over the surface and let it sit for 5-10 minutes until foamy and bubbly. If it doesn’t foam, your yeast might be expired or your milk too hot – start over! This step is crucial for fluffy rolls.
Step 2: Make the Dough (15 minutes)
In a large mixing bowl, whisk together the flour, remaining sugar, and salt. Create a well in the center and add the foamy yeast mixture, melted butter, and egg. Using a wooden spoon or stand mixer with dough hook, mix until a soft dough forms. Don’t worry if it looks a bit shaggy at first – that’s totally normal!
Turn the dough onto a lightly floured surface and knead for 8-10 minutes until smooth and elastic. The dough should spring back when poked gently. Here’s the secret: the dough should be slightly tacky but not sticky. Add flour gradually if needed, but resist the urge to add too much – we want tender rolls, not tough ones!
Step 3: First Rise (1-1.5 hours)
Place the dough in a greased bowl, turning once to coat all sides. Cover with a damp kitchen towel or plastic wrap and let rise in a warm spot until doubled in size. I like to turn my oven to 200°F for just 2 minutes, then turn it off and let the dough rise in there – works like a charm!
Step 4: Prepare the Filling
While the dough rises, make your cinnamon filling. In a medium bowl, cream together the softened butter, brown sugar, cinnamon, and salt until well combined. Pro tip: For an extra special touch, brown the butter in a small saucepan until fragrant and golden, then let it cool before mixing with the other ingredients. This adds an incredible nutty flavor!
Step 5: Roll and Fill (15 minutes)
Once doubled, punch down the dough gently and turn it onto a lightly floured surface. Roll into a 16×12-inch rectangle – don’t stress about perfect measurements, just aim for a nice rectangle! Spread the cinnamon filling evenly over the dough, leaving about a ½-inch border along one long edge.
Starting from the opposite long edge, tightly roll the dough into a log. Trust me on this: roll it snugly but don’t stretch the dough. Pinch the seam to seal, then use a sharp knife or dental floss to cut into 12 equal pieces. Dental floss actually works better than a knife – it won’t compress the rolls!
Step 6: Second Rise (45 minutes to 1 hour)
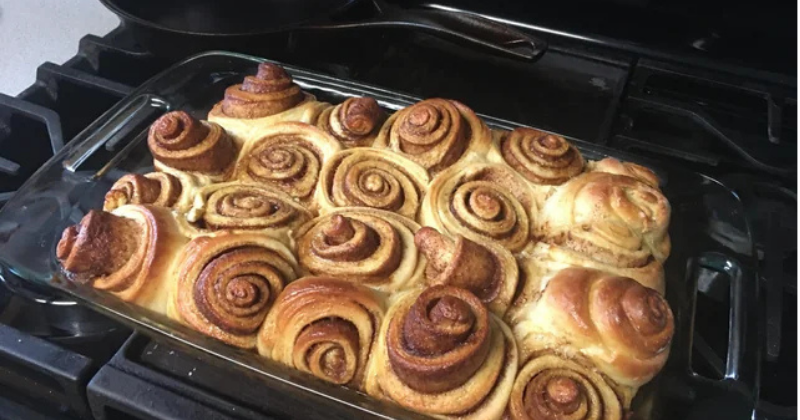
Arrange the cut rolls in a greased 9×13-inch baking dish, cut-side up. They should just barely touch each other. Cover and let rise again until puffy and touching – this is where the magic happens! The rolls will expand and create those beautiful, pull-apart layers.
Step 7: Bake to Golden Perfection (25-30 minutes)
Preheat your oven to 350°F. Bake the risen rolls for 25-30 minutes until golden brown on top. Don’t worry if they look pale at first – they’ll develop that gorgeous color in the final minutes. The internal temperature should reach about 190°F if you want to be precise.
Step 8: Make the Frosting
While the rolls bake, prepare the cream cheese frosting. Beat the softened cream cheese and butter until light and fluffy. Gradually add the powdered sugar, then the milk, vanilla, and salt. Beat until smooth and spreadable. The consistency should be thick enough to stay put but thin enough to drizzle slightly.
Step 9: The Grand Finale
Let the rolls cool for about 5 minutes – just enough so they won’t completely melt the frosting but still warm enough to be gooey inside. Spread or drizzle the frosting generously over the warm rolls. This is where the magic happens – watching that creamy frosting slightly melt into all the crevices is pure joy!
Chef’s Tips & Variations
Make-Ahead Magic: Want fresh cinnamon rolls for breakfast without the early morning work? After cutting the rolls, arrange them in the baking dish, cover tightly, and refrigerate overnight. In the morning, let them come to room temperature and complete their second rise (about 1 hour), then bake as directed.
Storage Secrets: These rolls stay fresh covered at room temperature for 2-3 days. To reheat, wrap individual rolls in damp paper towel and microwave for 20-30 seconds, or warm the whole pan in a 300°F oven for 10 minutes.
Flavor Variations: Try adding chopped pecans or walnuts to the filling, or swap half the cinnamon for cardamom for a Scandinavian twist. Orange zest in both the dough and frosting creates amazing citrus rolls!
Pro Tip for Perfect Texture: The key to bakery-style soft rolls is not over-flouring. The dough should feel slightly tacky – this creates that tender, pillowy texture we’re after.
Troubleshooting: If your rolls don’t rise properly, check your yeast expiration date and make sure your liquids aren’t too hot (which kills yeast) or too cold (which makes it sluggish). Room temperature around 75-80°F is ideal for rising.
Frosting Alternatives: While cream cheese frosting is classic, you can also try a simple powdered sugar glaze, maple frosting, or even a drizzle of warm heavy cream with a sprinkle of cinnamon sugar.
Final Thoughts
These homemade cinnamon rolls are truly worth every minute of effort. There’s something so satisfying about creating these bakery-quality treats in your own kitchen – the smell alone will have your family gathering in the kitchen like magic! Don’t be intimidated by the yeast or the multiple steps; take it slow, trust the process, and you’ll be amazed at what you can create.
The beauty of this recipe is its flexibility. Make them for a special weekend breakfast, holiday morning, or even as an afternoon treat with coffee. They’re perfect for sharing with neighbors, bringing to potlucks, or just treating yourself to something special. Once you master this recipe, you’ll find yourself making them again and again – and everyone will think you’re a baking genius!
So grab your apron, put on some good music, and dive into this delicious adventure. Your kitchen is about to smell absolutely incredible, and you’re about to create some seriously happy faces around your table. You’ve got this!