
The Day I Discovered the Perfect Window Cleaning Solution
Let me tell you about the moment that changed my entire approach to window cleaning forever. It was a crisp Saturday morning, and I was staring at my living room windows in absolute frustration. Despite spending what felt like hours scrubbing with expensive commercial cleaners, they still looked streaky, cloudy, and frankly embarrassing. My neighbor’s windows sparkled like crystal, while mine looked like they hadn’t been cleaned in months.
That’s when my grandmother shared her secret – a simple homemade window cleaner that had been passed down through generations. This isn’t just another cleaning tip; it’s a game-changer that will transform your windows from grimy eyesores to crystal-clear portals of light. What you’re about to learn is a method so effective, so simple, and so budget-friendly that you’ll wonder why you ever bought commercial window cleaners again.
Table of Contents
Why This Homemade Window Cleaner Works Miracles
Here’s what makes this cleaning solution absolutely phenomenal: it combines the power of white vinegar’s natural cleaning properties with the streak-fighting abilities of dish soap and the finishing touch of rubbing alcohol. Unlike commercial cleaners that often leave residue or require multiple applications, this homemade formula cuts through grime, dissolves mineral deposits, and leaves your windows spotless in one go.
Difficulty Level: Beginner-friendly
Time Commitment: 15-20 minutes for an average-sized window
Cost: Less than $1 per batch (compared to $4-6 for commercial cleaners)
The beauty of this method lies in its simplicity and effectiveness. You probably already have most of these ingredients in your kitchen right now, and the results will rival any professional window cleaning service.
What You’ll Need for Crystal-Clear Windows
Essential Ingredients:
- 2 cups warm water (distilled water works best, but tap water is fine)
- 1/2 cup white vinegar (the star ingredient that cuts through grime)
- 1/4 cup rubbing alcohol (70% isopropyl alcohol for streak-free finish)
- 1-2 drops liquid dish soap (Dawn works wonderfully, but any grease-cutting dish soap will do)
Equipment You’ll Need:
- 1 spray bottle (16-20 oz capacity)
- Microfiber cloths (at least 2 – one for cleaning, one for drying)
- Squeegee (optional but highly recommended for large windows)
- Old newspapers or lint-free paper towels
- Small funnel for easy mixing
Pro tip: Never use fabric softener on your microfiber cloths – it reduces their cleaning effectiveness by coating the fibers!
Helpful Substitutions:
If you don’t have rubbing alcohol on hand, you can substitute with vodka (yes, really!) or simply increase the vinegar to 3/4 cup. For extremely dirty windows, add an extra drop of dish soap, but don’t go overboard – too much soap creates more streaks.
Step-by-Step Window Cleaning Method
Step 1: Create Your Magical Cleaning Solution
Start by gathering your ingredients in a clean workspace. Here’s where the magic begins – the order of mixing actually matters! Pour the warm water into your spray bottle first using a funnel to avoid spills. The warm water helps dissolve everything more effectively than cold water.
Add the white vinegar next. You’ll notice a slight vinegar smell, but don’t worry – this dissipates quickly and leaves no odor behind. Follow with the rubbing alcohol, which is your secret weapon against streaks and water spots.
Finally, add just 1-2 drops of dish soap. Trust me on this – more is not better when it comes to soap in window cleaner. Too much soap creates a film that’s harder to remove than the original dirt!
Step 2: Mix and Test Your Formula
Gently swirl the bottle to combine all ingredients. Avoid shaking vigorously as this creates too many suds. Test your mixture on a small, inconspicuous area of the window first – this ensures the solution works well with your specific type of glass and doesn’t react with any existing treatments.
Step 3: Prep Your Windows Like a Pro
Remove any loose dirt, cobwebs, or debris from the window frame and sill using a dry cloth or small brush. This step is crucial – you don’t want to push dirt around the glass surface during cleaning.
For extremely dirty windows, do a quick pre-rinse with plain water to remove the heaviest grime. This prevents you from dragging dirt across the glass and potentially scratching it.
Step 4: Apply the Cleaning Solution
Spray your homemade cleaner generously across the entire window surface, working from top to bottom. Don’t be shy with the solution – adequate coverage is key to effective cleaning. You want the entire surface evenly coated but not dripping excessively.
For large windows, work in sections to prevent the solution from drying before you can wipe it away. Here’s the secret: cleaning windows in direct sunlight or extreme heat makes the solution dry too quickly, leading to streaks.
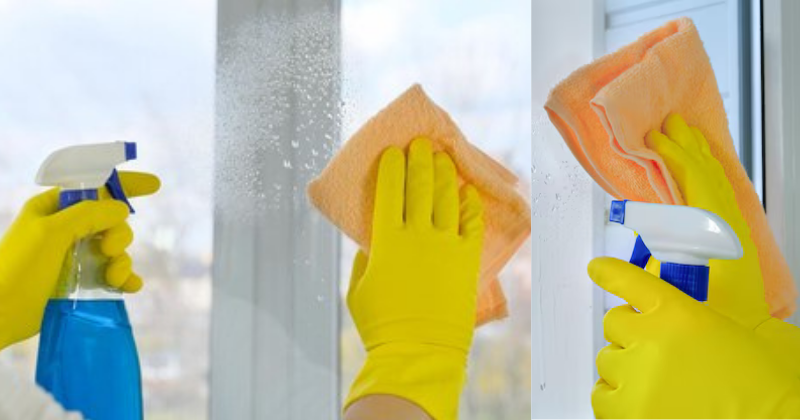
Step 5: The Cleaning Technique That Changes Everything
Using your microfiber cloth, start cleaning in a circular motion to lift dirt and grime. Then switch to straight, overlapping strokes from top to bottom. This two-step approach ensures you’re not just moving dirt around but actually removing it.
Pro tip: Keep one side of your microfiber cloth for cleaning and flip to the clean side for final buffing. This prevents redistributing dirt and moisture.
Step 6: Squeegee Like a Professional (Optional but Recommended)
If using a squeegee, start at the top corner and pull down in straight, overlapping strokes. Wipe the squeegee blade clean after each stroke with a lint-free cloth. This technique eliminates water spots and gives you that professional finish.
Step 7: Final Buff and Inspection
Use a dry microfiber cloth or crumpled newspaper to buff away any remaining moisture and give your windows that final sparkle. This is where the magic happens – you’ll see your windows transform from clean to absolutely crystal-clear.
Inspect your work from both inside and outside if possible. Any remaining streaks can be quickly buffed away with a dry cloth.
Expert Tips and Cleaning Variations
Weather Timing is Everything: The best time to clean windows is on an overcast day or when windows are in shade. Bright sunlight causes the cleaning solution to dry too quickly, leading to streaks no matter how good your technique.
The Professional’s Secret: Clean the inside of windows with horizontal strokes and the outside with vertical strokes. This way, if you see streaks, you’ll know exactly which side needs attention.
Hard Water Solution: If you live in an area with hard water, increase the vinegar to 3/4 cup and add 1 tablespoon of lemon juice. The extra acid helps dissolve mineral deposits more effectively.
For Extremely Dirty Windows: Make a paste with baking soda and a small amount of your cleaning solution for tough spots. Apply gently with a soft cloth, then clean with your regular solution.
Storage and Shelf Life: This homemade cleaner stays effective for up to 3 months when stored in a cool, dark place. Label your bottle with the date and ingredients for future reference.
Seasonal Variations: In winter, add an extra 2 tablespoons of rubbing alcohol to prevent the solution from freezing on cold glass. For spring cleaning, add a few drops of essential oil like lemon or lavender for a fresh scent.
Money-Saving Tip: This recipe makes enough cleaner for 15-20 windows and costs less than $1 per batch. Compare that to commercial cleaners at $4-6 per bottle, and you’re looking at serious savings!
Troubleshooting Common Window Cleaning Problems
Streaky Results: Usually caused by too much soap, dirty cloths, or cleaning in direct sunlight. Reduce soap to 1 drop and ensure your microfiber cloths are clean and fabric-softener-free.
Cloudy Appearance: This often indicates mineral buildup from hard water. Increase vinegar content and consider using distilled water for mixing.
Lint or Residue: Switch from paper towels to microfiber cloths or use crumpled newspaper for the final buff. Never use fabric softener sheets or treated paper products.
Transform Your Home’s Appearance Today
You’ve got this! With this simple homemade window cleaner and proper technique, you’re equipped to achieve professional-quality results that will make your neighbors wonder if you hired a cleaning service. The best part? Once you see how effective and economical this solution is, you’ll never go back to expensive commercial cleaners.
Remember, clean windows don’t just improve your home’s appearance – they actually let in more natural light, making your living spaces feel brighter and more welcoming. Don’t worry if your first attempt isn’t perfect – like any skill, window cleaning improves with practice.
Start with one window to test your technique, then work your way around your home. Before you know it, you’ll have crystal-clear windows that sparkle like diamonds and a sense of accomplishment that comes from mastering this essential home maintenance skill. Trust me, once you experience the satisfaction of perfectly clean windows achieved with your own homemade solution, you’ll be looking for excuses to clean them more often!