
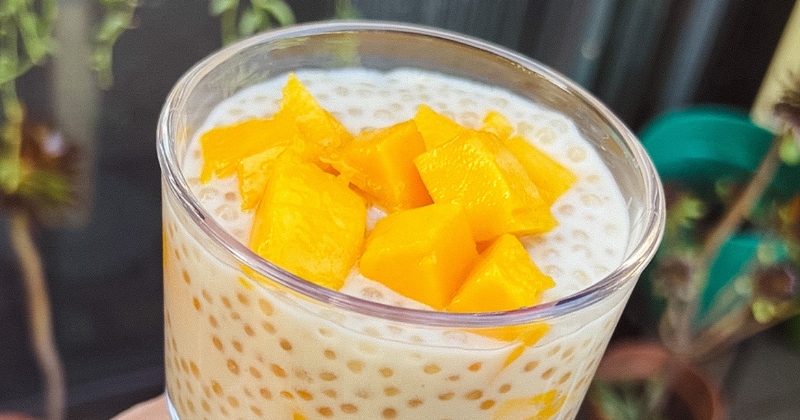
Let me tell you about the dessert that completely changed my relationship with tropical flavors! I first discovered mango sago at a tiny Malaysian restaurant tucked away in Chinatown, and honestly, it was love at first spoonful. The combination of silky coconut milk, perfectly ripe mango chunks, and those delightfully chewy tapioca pearls created this incredible texture symphony that I couldn’t stop thinking about for weeks.
What makes this dessert absolutely magical is how it balances sweetness, creaminess, and that satisfying chewiness from the sago pearls. It’s like summer vacation captured in a bowl – refreshing, indulgent, and surprisingly easy to make at home. Trust me, once you master this recipe, you’ll be the hero of every dinner party and family gathering!
Table of Contents
What Makes Mango Sago So Special?
This isn’t just another fruit dessert – it’s a textural masterpiece that originated in Hong Kong’s cha chaan tengs (tea restaurants) and has become a beloved treat across Southeast Asia. The beauty lies in its simplicity: perfectly cooked sago pearls that have this amazing bouncy texture, luxuriously creamy coconut milk, and chunks of the sweetest, ripest mango you can find.
The difficulty level? Surprisingly beginner-friendly! The most challenging part is timing the sago pearls correctly, but I’ll walk you through every step. Total time commitment is about 45 minutes, with most of that being hands-off cooking time. Pro tip: This dessert actually gets better after chilling overnight, so it’s perfect for make-ahead entertaining!
Ingredients
Serves 4-6 people generously
For the Sago Base:
- 1 cup small sago pearls (also called tapioca pearls – look for the small, white ones)
- 6-8 cups water for cooking
- 1 can (14 oz) coconut milk (full-fat works best for richness)
- 1/3 cup sugar (adjust to your sweetness preference)
- 1/4 teaspoon salt (this enhances all the flavors!)
For the Mango Elements:
- 2-3 large ripe mangoes (about 2 pounds total)
- 2 tablespoons sugar (optional, depending on mango sweetness)
- 1 tablespoon lime juice (brightens everything up)
For Garnish:
- Extra mango chunks
- Toasted coconut flakes (optional but amazing)
- Fresh mint leaves
Ingredient Tips: Choose mangoes that give slightly to gentle pressure and smell sweet at the stem end. Ataulfo mangoes are my absolute favorite for this – they’re incredibly sweet and have minimal fiber. If you can only find coconut milk in cartons, make sure it’s the full-fat version for the best creamy texture.
Cooking Method
Total Time: 45 minutes (plus chilling time)
Step 1: Preparing the Sago Pearls (20 minutes)
Bring a large pot of water to a rolling boil – and I mean really rolling! You want plenty of water because sago pearls need room to dance around. Here’s the secret: never add sago to cold water or they’ll turn into a gluey mess.
Add the sago pearls slowly while stirring constantly. This prevents them from sticking together right from the start. Cook for about 10-12 minutes, stirring occasionally. You’ll know they’re ready when they turn from opaque white to mostly translucent with just a tiny white dot in the center.
Pro tip: Don’t worry if they look a little underdone – they’ll continue cooking in the residual heat! Drain them immediately and rinse with cold water until the water runs clear. This stops the cooking process and removes excess starch.
Step 2: Creating the Coconut Base (10 minutes)
In a medium saucepan, gently warm the coconut milk over medium-low heat. Don’t let it boil – just warm it enough to dissolve the sugar completely. Stir in the sugar and salt until everything dissolves beautifully.
Trust me on this: taste your coconut mixture at this point. The sweetness should be pleasant but not overwhelming because the mango will add its own natural sweetness. Add the drained sago pearls to the coconut mixture and stir gently. Let this cool to room temperature before refrigerating.
Step 3: Preparing the Perfect Mango (15 minutes)
Here’s where the magic happens! Peel your mangoes and cut them into chunks – I like a mix of sizes for interesting texture. Reserve about half the mango for folding into the dessert later.
Take the remaining mango and blend it until silky smooth. If your mangoes are super sweet, you might not need any additional sugar. But if they’re a bit tart, add those 2 tablespoons of sugar and the lime juice. The lime juice isn’t just for flavor – it prevents the mango from browning and adds this gorgeous brightness that makes everything pop!
Step 4: Bringing It All Together (5 minutes)
Once your sago mixture has cooled completely, gently fold in about half of your mango puree and most of your mango chunks. Save some of the prettiest chunks for garnishing – presentation matters!
The mixture should be creamy, chunky, and absolutely gorgeous. If it seems too thick, you can thin it with a little extra coconut milk. Too thin? No worries – it’ll thicken up as it chills.
Step 5: The Final Chill
Transfer everything to individual serving bowls or one large bowl, cover tightly, and refrigerate for at least 2 hours. Overnight is even better – all those flavors meld together into something truly spectacular.
Chef’s Tips & Variations
Storage Secrets: This dessert keeps beautifully in the fridge for up to 3 days. The sago pearls might absorb some liquid over time, so don’t panic if it looks a bit thicker the next day – just stir in a splash of coconut milk to loosen it up.
Texture Variations: Want to get fancy? Try adding some diced fresh coconut for extra tropical vibes, or fold in some lychee chunks for an elevated twist. I’ve even seen people add a layer of crushed ice on top for extra refreshment on hot days!
Make It Your Own: Feel free to experiment with the sweetness levels. Some people love adding a touch of pandan extract for that gorgeous green color and unique flavor. Others swirl in a bit of condensed milk for extra richness.
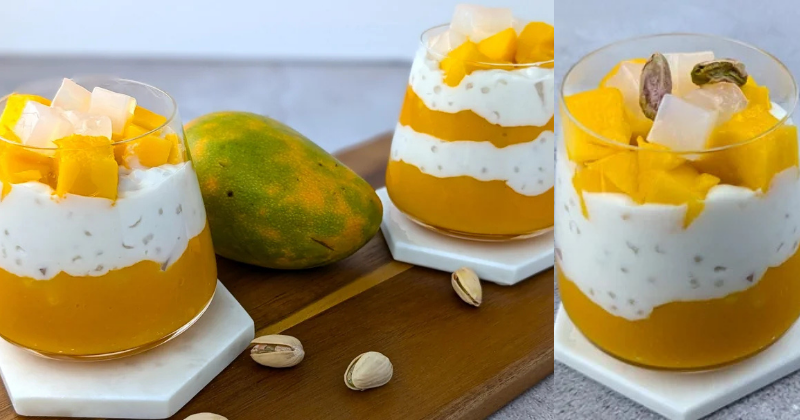
Pro tip for entertaining: Serve this in clear glasses so everyone can see those beautiful layers. Top with toasted coconut flakes and a sprig of fresh mint for that restaurant-quality presentation that’ll have your guests asking for the recipe!
Troubleshooting: If your sago pearls turn out mushy, you probably overcooked them or didn’t rinse them well enough. If they’re too firm, they needed a few more minutes of cooking time. Don’t worry – it takes a couple tries to get the timing perfect, but once you do, you’ll be a sago master!
Final Thoughts
There’s something so satisfying about creating this gorgeous dessert from scratch. Every spoonful delivers this incredible combination of creamy, fruity, and chewy textures that’s absolutely addictive. It’s refreshing enough for hot summer days but indulgent enough to feel like a real treat.
You’ve got this! Don’t be intimidated by cooking sago pearls – they’re much more forgiving than you think. Even if your first attempt isn’t picture-perfect, it’ll still taste absolutely amazing.
Serve this beauty after a spicy Asian meal, at your next backyard barbecue, or honestly, just because you deserve something wonderful on a random Tuesday. Pair it with some crispy almond cookies or enjoy it on its own – either way, you’re in for a tropical treat that’ll transport you straight to paradise. Get ready to become everyone’s favorite dessert person!