
Let me tell you about the time I tried to make s’mores indoors during a particularly brutal winter storm. Picture this: three kids bouncing off the walls, a fireplace that decided to act up, and me desperately trying to toast marshmallows over a gas stove burner. It was a disaster of epic proportions! That’s when I discovered the absolute genius that is s’mores dip – all the gooey, chocolatey, marshmallow-y goodness of traditional s’mores, but without the need for an open flame or perfect weather.
This incredible dessert has become my go-to party trick and family favorite. Whether you’re hosting a cozy movie night, planning a birthday party, or just craving that nostalgic campfire taste, this s’mores dip delivers every single time. Trust me, once you try this melted masterpiece, you’ll wonder why anyone bothers with individual s’mores anymore!
Table of Contents
What Makes This S’mores Dip So Special?
S’mores dip is essentially a deconstructed s’more that’s been transformed into the ultimate shareable dessert. Instead of assembling individual treats, you create one magnificent skillet or baking dish filled with melted chocolate and golden, bubbling marshmallows. The result? Pure magic that feeds a crowd and creates those same childhood memories we all cherish.
What sets this recipe apart is how incredibly simple yet impressive it is. We’re talking about a dessert that requires just three main ingredients and about 10 minutes of your time, but delivers restaurant-quality results that’ll have everyone asking for the recipe. The difficulty level? Absolute beginner-friendly. If you can turn on an oven and open a few packages, you’ve got this!
The beauty of s’mores dip lies in its versatility – you can make it in a cast iron skillet for that rustic campfire vibe, use a ceramic baking dish for elegant entertaining, or even prepare individual portions in ramekins for a more refined presentation.
Ingredients You’ll Need
Serves 6-8 people
For the Base:
- 2 cups milk chocolate chips (or chopped chocolate bars)
- 3 cups mini marshmallows (divided into 2 cups and 1 cup)
- 2 tablespoons heavy cream (optional, for extra creaminess)
For Serving:
- 1 box honey graham crackers (broken into dipping-friendly pieces)
- Fresh strawberries (optional, but absolutely divine)
- Pretzel rods (for extra crunch)
Pro tip: I always use high-quality chocolate chips like Ghirardelli or Guittard – the better your chocolate, the more incredible your dip will taste. Don’t skimp here; your taste buds will thank you!
Ingredient substitutions: Feel free to experiment with different chocolates! Dark chocolate creates a more sophisticated flavor, while white chocolate makes for a sweeter, kid-friendly version. You can also use regular-sized marshmallows cut in half if that’s what you have on hand.

Step-by-Step Instructions
Step 1: Prepare Your Equipment
Preheat your oven to 450°F (230°C). Choose your vessel – I’m partial to a 10-inch cast iron skillet because it retains heat beautifully and gives that authentic campfire feel, but an 8×8 baking dish works perfectly too.
Here’s the secret: Lightly grease your skillet or baking dish with butter or cooking spray. This isn’t just about preventing sticking – it actually helps create those deliciously caramelized edges that everyone fights over!
Step 2: Create the Chocolate Foundation
Spread your chocolate chips evenly across the bottom of your prepared skillet. If you’re using the heavy cream (which I highly recommend!), drizzle it over the chocolate chips. This creates an incredibly smooth, creamy base that melts like a dream.
Pro tip: Don’t worry if the chocolate doesn’t cover every inch perfectly. As it melts, it’ll spread naturally and create that gorgeous, glossy surface we’re after.
Step 3: Add the First Layer of Marshmallows
Sprinkle 2 cups of mini marshmallows evenly over the chocolate chips. Try to distribute them as evenly as possible, but don’t stress about perfection – this is rustic comfort food at its finest!
Step 4: The First Bake
Pop your skillet into the preheated oven for 5-7 minutes. You’re looking for the chocolate to start melting and the marshmallows to begin puffing up. The edges might start getting slightly golden, which is exactly what we want.
Trust me on this: Don’t open the oven door too frequently during this step. Let the magic happen undisturbed!
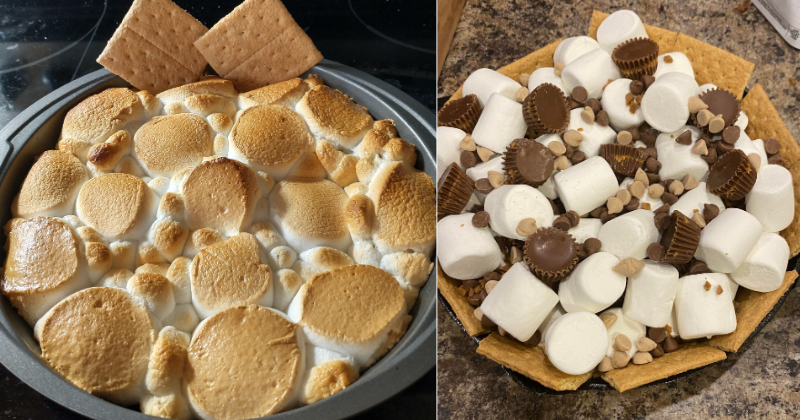
Step 5: Add the Final Marshmallow Layer
Remove the skillet from the oven (careful – it’s hot!) and sprinkle the remaining 1 cup of marshmallows on top. This creates those beautiful, perfectly golden peaks that make everyone’s mouth water.
Step 6: The Final Golden Touch
Return to the oven for another 2-3 minutes, just until the top layer of marshmallows turns that perfect golden brown. Keep a close eye during this final stage – marshmallows can go from golden perfection to charcoal in a matter of seconds!
Step 7: Serve Immediately
This is where the magic happens! Remove from the oven and serve immediately while everything is still bubbling and gooey. The contrast between the molten chocolate, fluffy marshmallows, and crispy graham crackers is absolutely divine.
Chef’s Tips & Variations
Storage secrets: If by some miracle you have leftovers, store them covered in the refrigerator for up to 3 days. Reheat in a 350°F oven for 5-10 minutes, or microwave in 30-second intervals until melty again.
Flavor variations that’ll blow your mind:
- Salted Caramel S’mores Dip: Add a drizzle of caramel sauce before the final bake and finish with sea salt flakes
- Peanut Butter Paradise: Mix in 2 tablespoons of creamy peanut butter with the chocolate
- Adult Version: Add a splash of bourbon or rum extract to the chocolate layer
- Seasonal Twist: Use cinnamon graham crackers in fall or add crushed peppermint candies for winter
Pro serving tip: Set up a s’mores dip bar with various dippers! Besides classic graham crackers, try chocolate chip cookies, vanilla wafers, apple slices, or even pound cake cubes. It turns dessert into an interactive experience that guests absolutely love.
Make-ahead magic: You can assemble this dip completely and refrigerate for up to 24 hours before baking. Just add an extra 2-3 minutes to the cooking time since you’re starting from cold.
Portion control hack: If you’re serving a smaller group, this recipe halves beautifully. Use a 6-inch skillet or small baking dish and reduce cooking times by about a minute.
Bringing It All Together
There’s something truly magical about watching people’s faces light up when you bring out a bubbling skillet of s’mores dip. It’s comfort food that instantly transports everyone back to summer camps, backyard fire pits, and simpler times. The best part? You get to be the hero who made it all happen with minimal effort and maximum impact.
This recipe has saved me countless times when I needed a crowd-pleasing dessert in a pinch. It’s become such a hit at our house that my kids now request it for birthday parties instead of traditional cake! The combination of melted chocolate, gooey marshmallows, and crunchy graham crackers creates a symphony of textures and flavors that’s absolutely irresistible.
Don’t be surprised if this becomes your signature dessert – it certainly became mine! Whether you’re hosting a casual get-together or need something special for a celebration, this s’mores dip delivers every single time. So grab your skillet, gather your loved ones, and get ready to create some seriously sweet memories. You’ve absolutely got this!