
There’s something absolutely magical about the first bite of a perfectly golden apple turnover. The way that buttery, flaky puff pastry gives way to warm, cinnamon-spiced apples inside – it’s pure comfort food bliss. I still remember the first time I made these beauties in my own kitchen. The smell alone had my neighbors knocking on my door, wondering what heavenly creation was happening behind my walls!
These apple turnovers have become my go-to treat whenever I want to impress guests or simply treat my family to something special. What I love most about this recipe is how it transforms simple ingredients into something that looks like it came straight from a fancy French bakery. Trust me, once you master this technique, you’ll never look at store-bought turnovers the same way again.
The best part? While they look incredibly sophisticated, these turnovers are surprisingly approachable for home bakers of all skill levels. You’re about to discover just how easy it is to create bakery-quality pastries in your own kitchen.
Table of Contents
Why These Apple Turnovers Are Absolutely Irresistible
These puff pastry apple turnovers represent everything I love about homemade baking. The contrast between the crispy, golden exterior and the tender, spiced apple filling creates a textural symphony that’s simply divine. Each turnover is like a little present – you never know exactly how the filling will distribute, making every bite a delightful surprise.
What makes this recipe truly special is the balance of flavors. The tartness of fresh apples plays beautifully against the warm spices, while the buttery puff pastry adds richness without overwhelming the fruit. It’s comfort food that feels elegant enough for special occasions.
Difficulty Level: Beginner to Intermediate
Prep Time: 25 minutes
Baking Time: 20-25 minutes
Total Time: 45-50 minutes
Serves: 8 generous turnovers
Essential Ingredients for Perfect Apple Turnovers
Here’s everything you’ll need to create these golden beauties. Don’t worry – most of these ingredients are probably already waiting in your pantry!
For the Apple Filling:
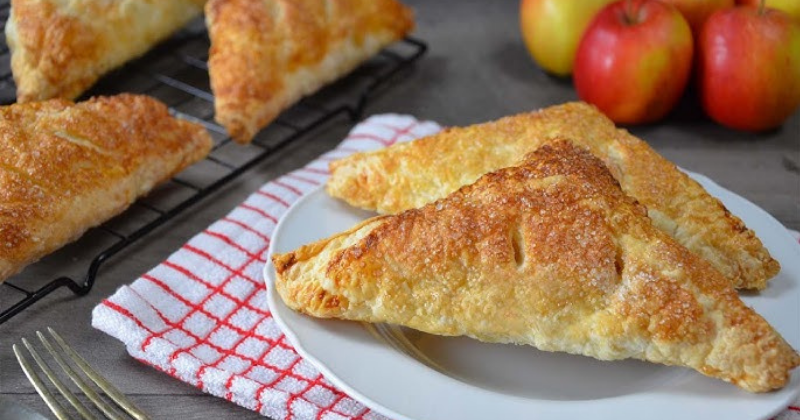
- 4 medium apples (Honeycrisp or Granny Smith work beautifully)
- 3 tablespoons granulated sugar
- 1 tablespoon brown sugar
- 1 teaspoon ground cinnamon
- 1/4 teaspoon ground nutmeg
- 1 tablespoon cornstarch
- 1 tablespoon lemon juice
- 1 tablespoon butter
For Assembly:
- 2 sheets frozen puff pastry (thawed according to package directions)
- 1 large egg (for egg wash)
- 2 tablespoons milk
- 2 tablespoons coarse sugar (for sprinkling)
Pro tip: When choosing apples, I always go for a mix of sweet and tart varieties. Honeycrisp brings sweetness and great texture, while Granny Smith adds that perfect tartness that prevents the filling from being overly sweet.
Step-by-Step Instructions for Bakery-Perfect Turnovers
Preparing Your Apple Filling
Start by preheating your oven to 400°F (200°C). This is where the magic begins! Peel your apples and dice them into small, uniform pieces – about 1/4-inch cubes work perfectly. Here’s the secret: smaller pieces cook more evenly and won’t create those awkward lumps that can tear your pastry.
In a large skillet over medium heat, melt that tablespoon of butter. Add your diced apples, both sugars, cinnamon, and nutmeg. Cook for about 5-7 minutes, stirring occasionally, until the apples just start to soften. You don’t want them mushy – they’ll continue cooking in the oven.
Sprinkle the cornstarch over the apples and stir well. Add the lemon juice and cook for another minute until the mixture thickens slightly. Remove from heat and let it cool completely. Trust me on this – hot filling will melt your puff pastry faster than you can say “apple turnover”!
Working with Puff Pastry Like a Pro
Here’s where many home bakers get nervous, but don’t worry – you’ve got this! Remove your thawed puff pastry from the refrigerator. Each sheet should be pliable but still cold. If it’s too warm, pop it back in the fridge for a few minutes.
On a lightly floured surface, gently roll each pastry sheet into a 12-inch square. Using a sharp knife or pizza cutter, divide each sheet into 4 equal squares. You should have 8 squares total – perfect for 8 generous turnovers.
Pro tip: Cold puff pastry is your friend! It holds its shape better and creates those beautiful, distinct layers we’re after. If your kitchen is particularly warm, work with one sheet at a time, keeping the other refrigerated.
Assembly Magic
Now comes the fun part! Place about 2 tablespoons of your cooled apple filling diagonally across each pastry square, leaving about an inch border on all sides. Don’t overfill – I learned this lesson the hard way when my first batch looked like apple volcanos!
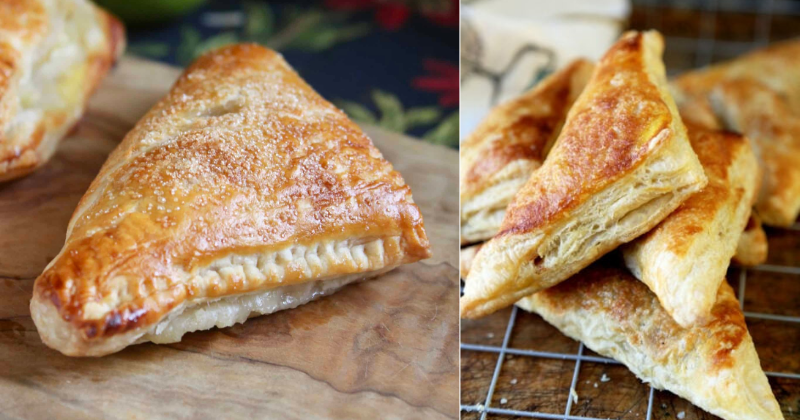
To create that classic turnover shape, fold the pastry diagonally over the filling, creating a triangle. Press the edges firmly with a fork to seal completely. This sealing step is crucial – it prevents your beautiful filling from leaking out during baking.
The Perfect Finish
Beat your egg with the milk to create a gorgeous egg wash. Brush the top of each turnover with this mixture – it’s what gives you that bakery-perfect golden shine. Sprinkle with coarse sugar for extra crunch and visual appeal.
Using a sharp paring knife, cut 2-3 small slits in the top of each turnover. These vents allow steam to escape and prevent the turnovers from bursting open dramatically in the oven.
Baking to Golden Perfection
Place your turnovers on a parchment-lined baking sheet, leaving about 2 inches between each one. Bake for 20-25 minutes, or until they’re gorgeously golden brown and puffed up like little pillows of joy.
The kitchen will smell absolutely incredible at this point – resist the urge to open them immediately! Let them cool on the baking sheet for at least 10 minutes. The filling will be molten hot, and trust me, burned tongues don’t enhance the eating experience.
Chef’s Secrets and Pro Tips
After making hundreds of these turnovers, I’ve learned a few tricks that separate good turnovers from absolutely spectacular ones. Here’s the secret: the key to flaky puff pastry is keeping everything cold and working quickly. If your pastry starts getting too warm and sticky, don’t hesitate to pop it back in the refrigerator for 15 minutes.
For an extra special touch, try adding a tablespoon of vanilla extract to your apple filling, or experiment with different spice combinations. A pinch of cardamom or ginger can transform these from delicious to absolutely divine.
Storage wisdom: These turnovers are best enjoyed warm from the oven, but they’ll keep at room temperature for up to 2 days. To reheat, pop them in a 350°F oven for 5-8 minutes rather than using the microwave – this keeps the pastry crispy.
Want to make them ahead? Assemble the turnovers completely, then freeze them unbaked on a baking sheet. Once frozen solid, transfer to freezer bags. Bake directly from frozen, adding an extra 5-10 minutes to the baking time.
Variation ideas: Try substituting pears for a more delicate flavor, or add a handful of dried cranberries or chopped walnuts to the apple mixture. For chocolate lovers, a few mini chocolate chips mixed into the filling creates an irresistible apple-chocolate combination.
The Sweet Reward Awaits
There’s something deeply satisfying about pulling a tray of golden, perfectly puffed apple turnovers from your oven. The way they glisten with that egg wash, the slight caramelization around the edges, the way they smell like autumn and comfort and home – it’s pure baking magic.
These turnovers are perfect for weekend breakfast treats, afternoon tea, or even an elegant dessert served with vanilla ice cream. They’re impressive enough for company but easy enough for a regular Tuesday when you want to make something special happen in your kitchen.
Don’t be surprised if this recipe becomes a regular in your baking rotation. Once you experience the joy of biting through that flaky pastry into the warm, spiced apple center, you’ll understand why apple turnovers have been beloved for generations. Go ahead, give them a try – your kitchen deserves to smell this amazing!