
Let me tell you about the day I discovered the magic of maple syrup in apple pie. I was prepping for Thanksgiving dinner three years ago, frantically trying to elevate my usual apple pie recipe when I spotted a bottle of pure maple syrup sitting on my counter. On a whim, I drizzled some into my apple filling, and honestly? It was one of those lightbulb moments that completely changed how I bake!
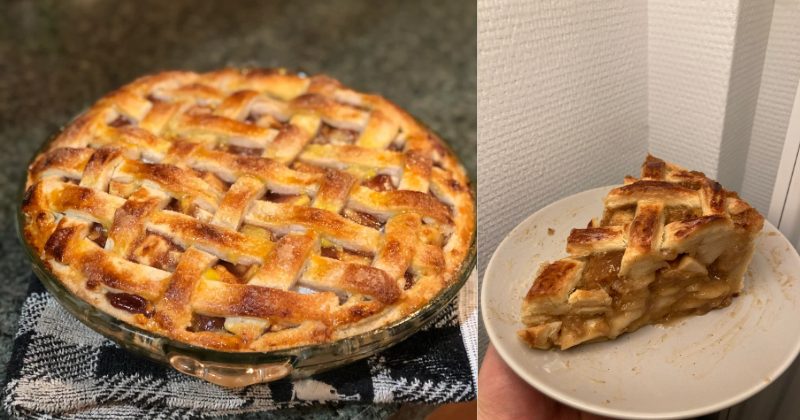
This maple apple pie isn’t just another dessert – it’s pure autumn comfort wrapped in a buttery, flaky crust. The maple syrup adds this incredible depth and warmth that makes regular sugar seem boring in comparison. Trust me, once you try this version, you’ll never go back to plain apple pie again. The combination of tart apples, rich maple syrup, and warming spices creates something truly special that’ll have your whole house smelling like a cozy fall day.
Table of Contents
What Makes This Maple Apple Pie So Special
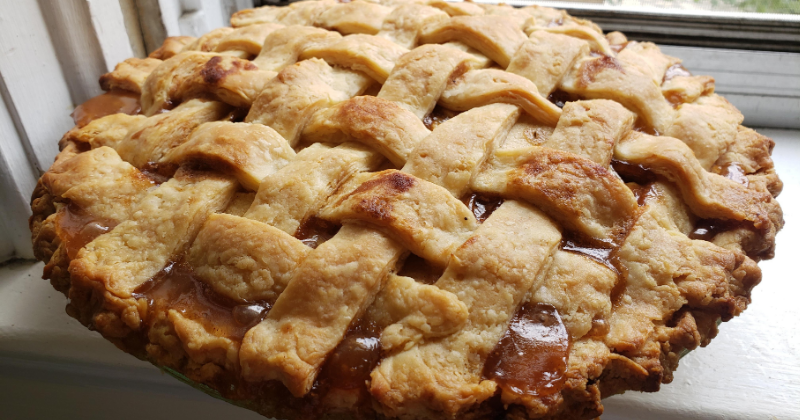
This isn’t your grandmother’s apple pie (though I’m sure hers was amazing too!). What sets this maple apple pie apart is how the maple syrup works its magic with the apples during baking. Unlike regular sugar that just sweetens, maple syrup creates this beautiful caramelized layer that coats each apple slice with glossy, amber goodness.
The beauty of this recipe lies in its perfect balance – the natural tartness of the apples plays beautifully against the rich sweetness of pure maple syrup, while a hint of cinnamon and nutmeg ties everything together. It’s sophisticated enough for special occasions but simple enough for a random Tuesday when you’re craving something homemade and wonderful.
Difficulty Level: Intermediate (but totally doable!)
Total Time: About 3 hours (including cooling time)
Active Time: 45 minutes
Serves: 8 generous slices
Ingredients
For the Perfect Pie Crust:
- 2½ cups all-purpose flour
- 1 teaspoon salt
- 1 tablespoon granulated sugar
- 1 cup cold unsalted butter, cubed
- 6-8 tablespoons ice water
For the Maple Apple Filling:
- 8-10 medium apples (I love using a mix of Granny Smith and Honeycrisp)
- ¾ cup pure maple syrup (don’t even think about using the fake stuff!)
- ¼ cup all-purpose flour
- 1 teaspoon ground cinnamon
- ¼ teaspoon ground nutmeg
- ¼ teaspoon salt
- 2 tablespoons butter, cut into small pieces
- 1 tablespoon lemon juice
- 1 egg, beaten (for egg wash)
- 2 tablespoons coarse sugar for sprinkling
Pro tip: When selecting apples, aim for a mix of tart and sweet varieties. The tartness prevents your pie from becoming too sweet, while the different textures create more interesting bites!
Cooking Method
Making the Crust (The Foundation of Greatness!)
Time: 30 minutes + 1 hour chilling
- Create your flour mixture by whisking together flour, salt, and sugar in a large bowl. This is where patience really pays off – don’t rush the crust!
- Cut in the cold butter using a pastry cutter or your fingers until the mixture looks like coarse crumbs with some pea-sized butter pieces. Those butter chunks are your ticket to a flaky crust, so don’t overwork it!
- Add ice water gradually, starting with 6 tablespoons and mixing gently with a fork. Add more water one tablespoon at a time until the dough just comes together. Here’s the secret: the dough should feel slightly shaggy, not smooth.
- Divide and wrap the dough into two discs, wrap in plastic wrap, and refrigerate for at least 1 hour. Trust me on this – cold dough = easier rolling and better texture!
Preparing the Star of the Show: Maple Apple Filling
Time: 20 minutes
- Peel and slice your apples into ¼-inch thick slices. I like to cut them into uniform pieces so they cook evenly. Don’t worry if they’re not perfect – rustic is beautiful!
- Toss apples with lemon juice immediately to prevent browning. This step also adds a lovely brightness that balances the maple sweetness.
- Create your maple magic by combining maple syrup, flour, cinnamon, nutmeg, and salt in a large bowl. Whisk until smooth – this mixture will coat every apple slice with incredible flavor.
- Fold the apples into the maple mixture until every piece is beautifully coated. The smell alone will make you want to dive right in!
Assembly Time (This is Where the Magic Happens!)
Time: 15 minutes
- Roll out your bottom crust on a floured surface to about 12 inches in diameter. Don’t stress if it’s not perfectly round – character adds charm! Transfer to a 9-inch pie pan and gently press into place.
- Fill with your maple apple mixture, mounding it slightly in the center. Dot with those butter pieces – they’ll create little pockets of richness as they melt.
- Roll out the top crust and carefully place over the filling. Trim edges to about 1 inch overhang, then fold under and crimp decoratively. This is your chance to get creative with the edges!
- Cut steam vents in the top crust – I like to make a few small slashes or even cut out tiny leaf shapes. Brush with beaten egg and sprinkle with coarse sugar for that gorgeous golden finish.
The Grand Finale: Baking Your Masterpiece
Time: 50-60 minutes
- Preheat your oven to 425°F and position a rack in the lower third. Place your pie on a baking sheet to catch any delicious drips.
- Bake for 20 minutes at 425°F, then reduce temperature to 375°F and continue baking for 30-40 minutes until the crust is golden brown and filling is bubbly.
- Cool completely before slicing – I know this is torture, but it’s crucial! The filling needs time to set, or you’ll have delicious maple apple soup instead of perfect slices.
Chef’s Tips & Variations
Storage secrets: This pie keeps beautifully at room temperature for 2 days or in the fridge for up to 5 days. For longer storage, wrap well and freeze for up to 3 months.
Reheating magic: Warm individual slices in a 350°F oven for 10 minutes to restore that just-baked texture. The microwave works in a pinch, but the oven gives you that crispy crust back!
Flavor variations I absolutely love:
- Add ½ cup chopped walnuts or pecans for crunch
- Stir in ¼ cup dried cranberries for tartness
- Try a splash of bourbon in the filling for grown-up flavor
- Experiment with cardamom instead of nutmeg for something exotic
Pro tip for perfect slices: Use a sharp knife and wipe it clean between cuts. A pizza wheel also works surprisingly well for clean cuts through that beautiful crust!
Make-ahead magic: You can assemble this pie completely and freeze it unbaked for up to 3 months. Bake straight from frozen, adding about 15 extra minutes to the baking time.
Serving suggestions: This pie is incredible on its own, but it’s absolutely divine with a scoop of vanilla ice cream or a dollop of fresh whipped cream. For something special, try it with maple whipped cream – just add a tablespoon of maple syrup to your cream before whipping!
Your Kitchen Will Never Smell Better
There’s something truly magical about the aroma of maple apple pie baking in your oven. It’s the smell of home, of comfort, of autumn afternoons and family gatherings. This recipe has become my go-to for every fall celebration, and I can’t wait for you to experience that first bite – the way the maple-glazed apples practically melt in your mouth while the flaky crust provides the perfect contrast.
Don’t be intimidated by pie-making if you’re new to it. Yes, it takes a little time and patience, but the results are so worth it. Plus, there’s something incredibly satisfying about creating something this beautiful and delicious from scratch. Your family and friends will be absolutely amazed, and you’ll have that wonderful feeling of accomplishment that comes from mastering a classic.
So grab those apples, dust off your rolling pin, and get ready to fill your kitchen with the most incredible aromas. This maple apple pie is about to become your new signature dessert – you’ve got this!